Go to Configure your device page and setup your Pi for first-time use.
To install Git, use the Homebrew package management utility by following these steps:
-
Install Homebrew. If you've already installed Homebrew, go to step 2.
-
Press
Cmd + Spaceand enterTerminalto open a terminal. -
Run the following command:
/usr/bin/ruby -e "$(curl -fsSL https://raw.githubusercontent.com/Homebrew/install/master/install)"
-
-
Install Git by running the following command:
brew install git
Go to Docker website. Scroll down and find the Get Docker for Mac link. Click it for download and installation.
-
Run below command to clone the repo.
git clone https://github.com/Azure-Samples/iot-hub-c-raspberrypi-docker.git
-
Press
Cmd + Spaceto activate Spotlight Search and searchDocker. Choose the Docker application and start it.
Make sure Docker is running before executing any Docker command. First try restarting Docker whenever meeting any Docker issues.

-
Run below commands to do the build.
docker pull microsoft/iot-hub-c-raspberrypi-build docker run --rm -v $PWD/iot-hub-c-raspberrypi-docker/samples:/repo -it microsoft/iot-hub-c-raspberrypi-build /build.sh --source blink--rmis a Docker running option. For details, please check Docker reference.$PWD/iot-hub-c-raspberrypi-docker/samplesis your sample folder path if the repo is cloned to your current working directory.-voption maps your sample folder to/repofolder of the Ubuntu OS running inside Docker container.-itoption allows you to interact with the running Docker container.microsoft/iot-hub-c-raspberrypi-buildis Docker image name. Referencedockerfilefolder if you're interested in how it works./build.shis the shell script name inside the Ubuntu container.--source blinktellsbuild.shthatCMakeList.txtis underblinkfolder.


- Use SCP to deploy the built binary and sample code to your Pi's
/home/pifolder.
Below
<>parts need to be replaced with your own values.
cd </Users/user-name/some-path/iot-hub-c-raspberrypi-docker/samples>
scp -r blink <user name>@<device ip address>:/home/pi
scp build/blink/blink <user name>@<device ip address>:/home/pi/blink
-
Use SSH to login in to the Pi device and run the app.
ssh <user name>@<device ip address>
./blink/blink


-
Install Visual Studio Code
-
Download and install Visual Studio Code. Visual Studio Code is a lightweight but powerful source code editor.
-
Open VS Code and install extension named
C/C++. If you have already installed it, please make sure you're using the latest version.a. Type
codecommand in your Terminal.b. In VS Code, press
Cmd + Pand typeext install c/c++as below.
c. Click
Installto install the extension and reload VS Code as prompted.
-
-
The
C/C++extension needs a pipe program to communicate with a remote shell for remote debugging. Here we choose SSH. To avoid password input, we generate SSH key and upload it to Pi.a. Run
ssh-keygencommand in Terminal to generate SSH key.
b. Run
brew install ssh-copy-idto get the SSH key upload tool.
c. Run
ssh-copy-id <user name>@<device IP address>to upload the SSH key to device.
-
Generate
lanuch.json.- Run below command to open
blinkfolder.
code blink

- Press
F5key. VS Code will prompt for environment selection.
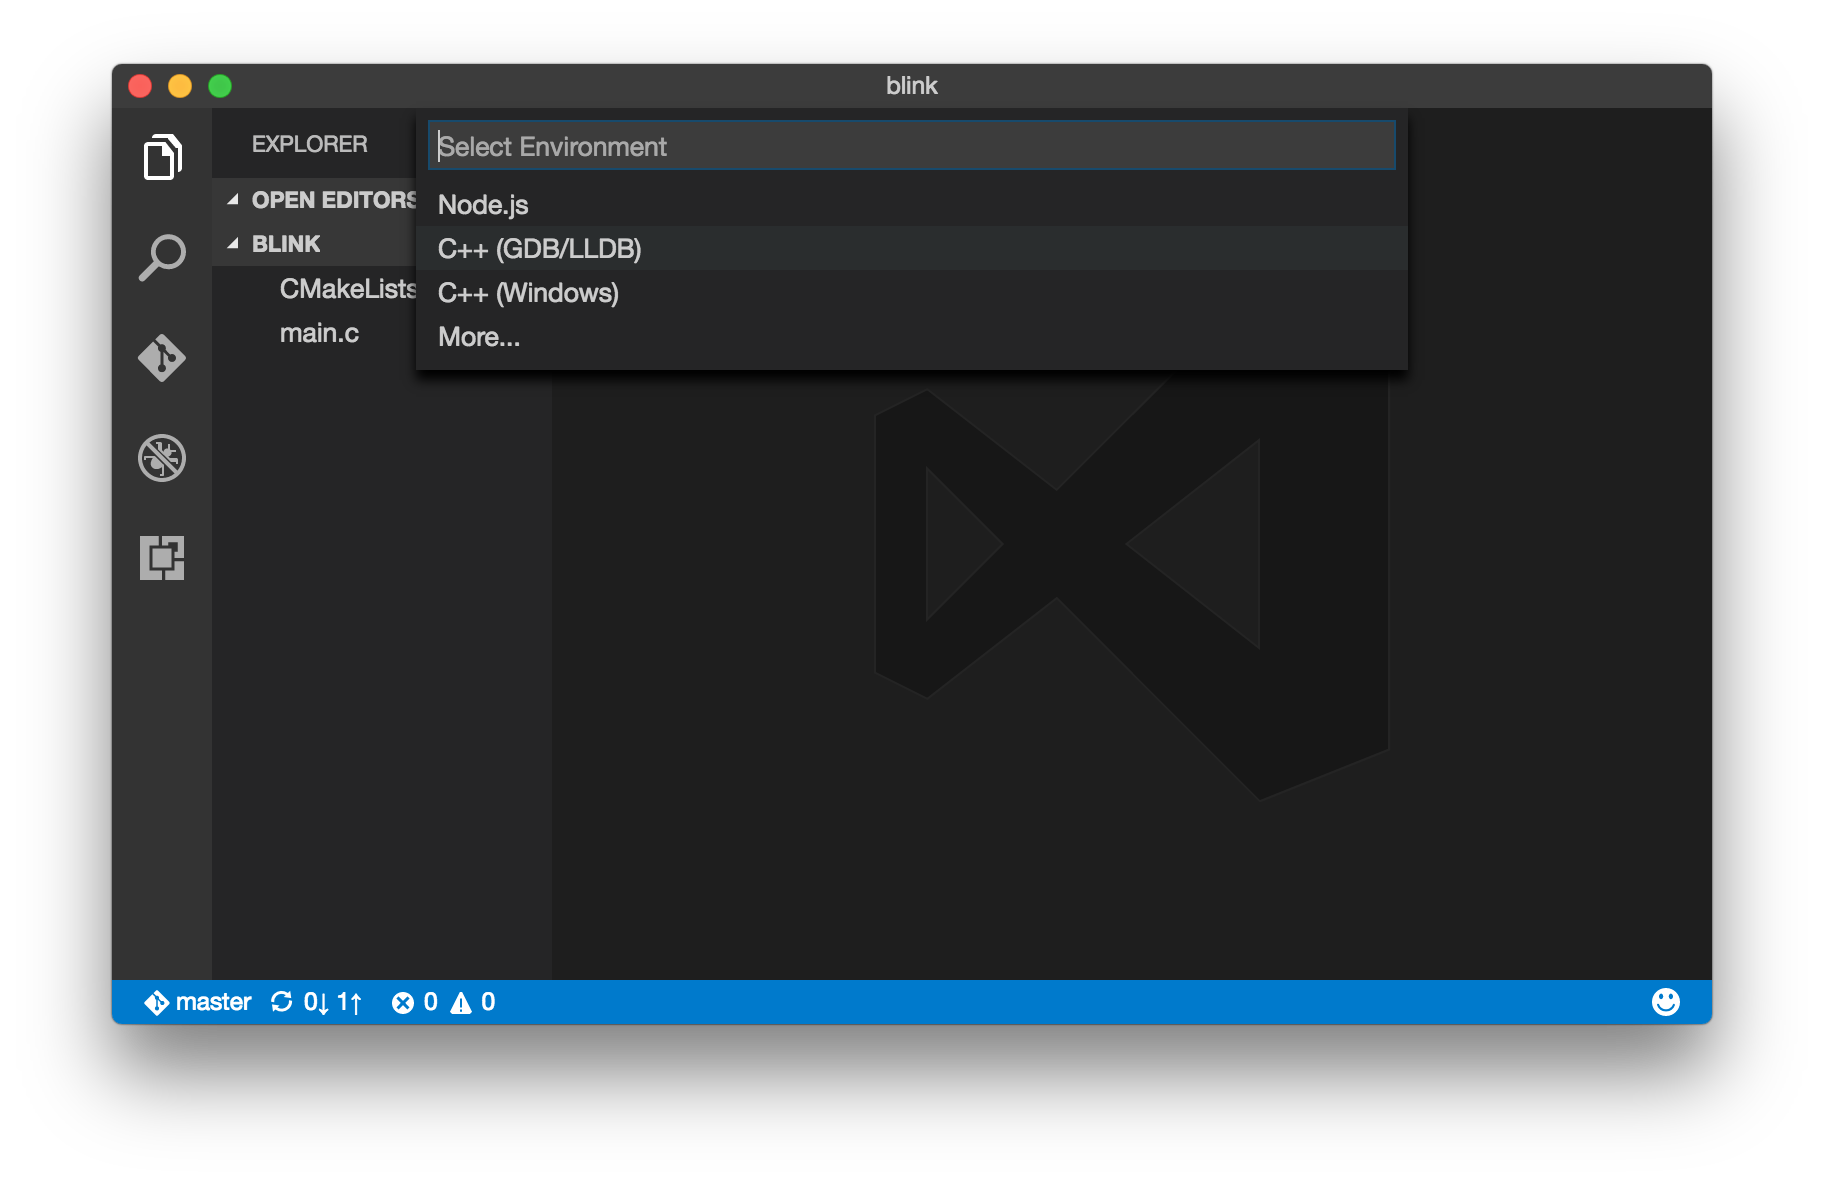
- Choose
C++(GDB/LLDB).launch.jsonis generated automatically.

- Run below command to open
-
Config
launch.json.-
programis the full path of the deployed app on device. The built binaryblink, underbuild/blinkfolder of host machine, is deployed to device's/home/pi/blinkfolder. So the full path value should be/home/pi/blink/blink. -
cwdis the working folder on device and should be/home/pi/blink. -
pipeTransportis for authenticating pipe connection. Paste below properties tolaunch.jsonand update the user name and IP address accordingly."pipeTransport": { "pipeCwd": "/usr/bin", "pipeProgram": "/usr/bin/ssh", "pipeArgs": [ "<user name>@<device ip address>" ], "debuggerPath": "/usr/bin/gdb" }, -
sourceFileMapis for mapping the path of where the code exists on the remote shell to where it is locally. Please add this property and update these two paths accordingly."sourceFileMap": { // "remote": "local" "/home/pi/blink": "</Users/user-name/some-path/iot-hub-c-raspberrypi-docker/samples/blink>" }, -
osxspecifies the debugger, which should begdbinstead oflldb. Simply replace its value withLinux's.

-
-
Debug
main.c.a. Open
main.cand insert breakpoints by pressingF9key.b. Start debugging by pressing
F5key. Code execution will stop at the breakpoint you set.c. Press
F10to debug step by step. Enjoy debugging!


If you're interested in how to send messages to IoT Hub, please check Azure IoT Hub tutorial.
This project has adopted the Microsoft Open Source Code of Conduct. For more information see the Code of Conduct FAQ or contact [email protected] with any additional questions or comments.