Installation
============
## Install HACS
- If you have not yet installed HACS, go get it at [https://hacs.xyz](https://hacs.xyz/) and walk through the installation and configuration.
## Install the OCPP Repository
- In Home Assistant, select HACS / Integrations / + Explore & add repositories.

- Search for 'OCPP' and install the repository.
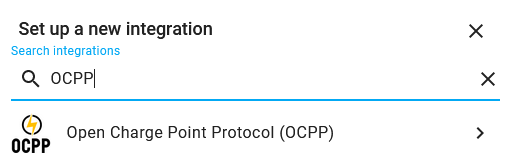
## Add the OCPP Integration
- In Home Assistant, select Configuration / Integrations / Add Integration.

- Search for 'OCPP' and add the integration.
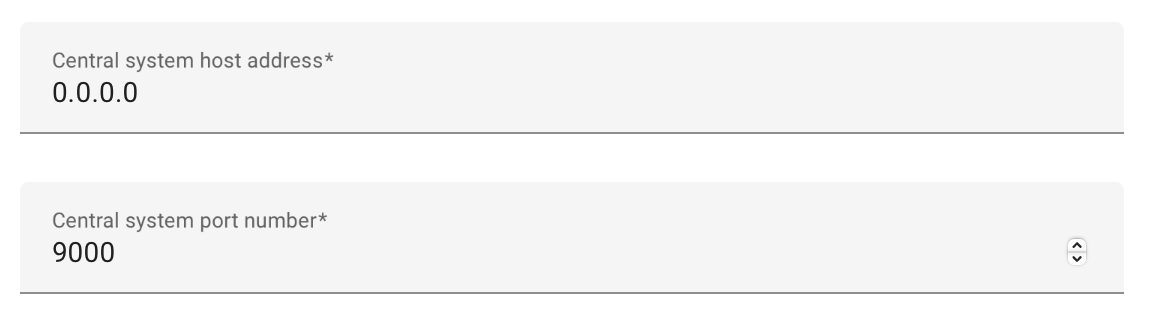
## Configure the Central System
### Host address and port
- The default host address '0.0.0.0' will listen to all interfaces on your home assistant server.
- The default port number is 9000 but can be changed for your needs.
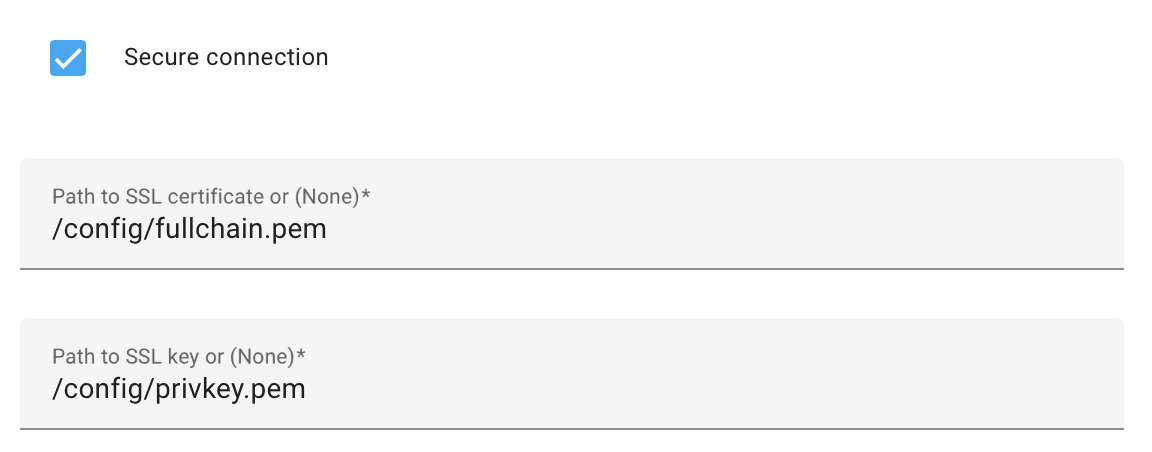
 ### Secure Connection
If you are using [Let’s Encrypt](https://github.com/home-assistant/addons/tree/master/letsencrypt), [Duck DNS](https://www.home-assistant.io/integrations/duckdns/) or other add-on that enables secure HTTPS for your Home Assistant instance, you can get a secure WSS connection for OCPP.
To use a secure connection:
- Enable the option _Secure connection_
- Provide the pathways to your HA's SSL certificate and key files. These are typically located in the /config or /ssl folder, and typically named fullchain.pem and privkey.pem respectively.
- If you provide incorrect pathways, the integration will fail to setup with no clear indication of why.
If you do not use HTTPS for your Home Assistant instance:
- Disable the option _Secure connection_
- _Path to SSL certificate/key_ will be ignored.
### Secure Connection
If you are using [Let’s Encrypt](https://github.com/home-assistant/addons/tree/master/letsencrypt), [Duck DNS](https://www.home-assistant.io/integrations/duckdns/) or other add-on that enables secure HTTPS for your Home Assistant instance, you can get a secure WSS connection for OCPP.
To use a secure connection:
- Enable the option _Secure connection_
- Provide the pathways to your HA's SSL certificate and key files. These are typically located in the /config or /ssl folder, and typically named fullchain.pem and privkey.pem respectively.
- If you provide incorrect pathways, the integration will fail to setup with no clear indication of why.
If you do not use HTTPS for your Home Assistant instance:
- Disable the option _Secure connection_
- _Path to SSL certificate/key_ will be ignored.
 ### Measurands
- Most chargers only support a subset of all possible measurands. This depends most on the Feature profiles that are supported by the charger.
- The integration will autodetect the supported measurands when the charger connects. This can be disabled for chargers that do not support autodetection.
## Add the entities to your Dashboard
- On the OCPP integration, click on devices to navigate to your Charge Point device.
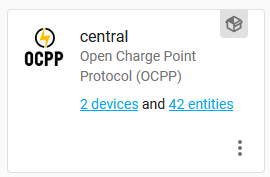
- At the bottom of the Entities panel, click on 'Add to Lovelace' to add the entities to your dashboard.
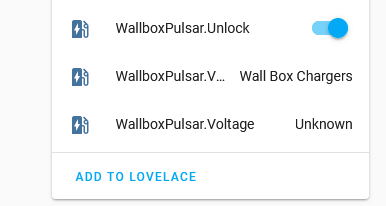
- An entity will have the value 'Unavailable' until the charger successfully connects.
- An entity will have the value 'Unknown' until its value has been read from the charger.
## Configure your Charger
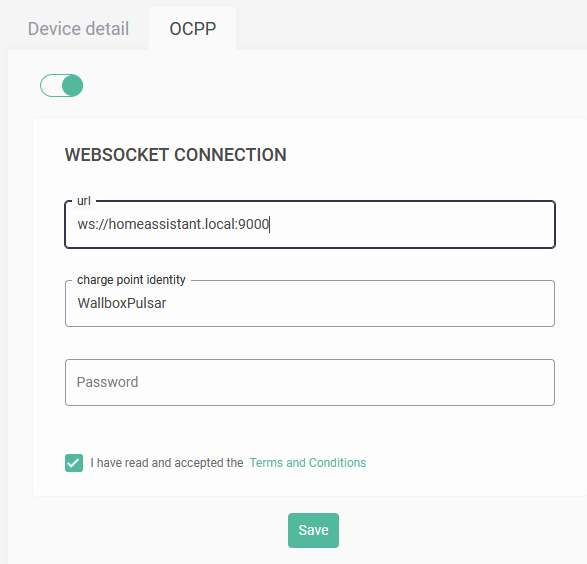
- Configure your charger to use the OCPP websocket of your Central System (e.g. ws://homeassistant.local:9000). This is charger specific, so consult your manual.
- Some chargers require the protocol section 'ws://' to be removed, or require the url to end with a '/'.
- If you have configured _Secure connection_ in previous step, you should use 'wss://'
- Some chargers require the url to be specified as an IP address, i.e. '192.168.178.1:9000'
- You may need to reboot your charger before the changes become effective.
## Start Charging
- Use the charge control switch to start the charging process.
### Measurands
- Most chargers only support a subset of all possible measurands. This depends most on the Feature profiles that are supported by the charger.
- The integration will autodetect the supported measurands when the charger connects. This can be disabled for chargers that do not support autodetection.
## Add the entities to your Dashboard
- On the OCPP integration, click on devices to navigate to your Charge Point device.

- At the bottom of the Entities panel, click on 'Add to Lovelace' to add the entities to your dashboard.

- An entity will have the value 'Unavailable' until the charger successfully connects.
- An entity will have the value 'Unknown' until its value has been read from the charger.
## Configure your Charger
- Configure your charger to use the OCPP websocket of your Central System (e.g. ws://homeassistant.local:9000). This is charger specific, so consult your manual.
- Some chargers require the protocol section 'ws://' to be removed, or require the url to end with a '/'.
- If you have configured _Secure connection_ in previous step, you should use 'wss://'
- Some chargers require the url to be specified as an IP address, i.e. '192.168.178.1:9000'
- You may need to reboot your charger before the changes become effective.

## Start Charging
- Use the charge control switch to start the charging process.
