A project for training and evaluating food classification models using PyTorch, MLflow, Hydra and Streamlit.
This project demonstrates a full MLOps pipeline: from automated data preparation, training, experiment tracking, and model selection, to testing and deployment of a live demo. All stages are designed to maximize reproducibility and automation, allowing you to run experiments, evaluate results, and deploy models with minimal manual intervention.
This project is inspired by the course PyTorch for Deep Learning Bootcamp by Daniel Bourke and Andrei Neagoie.
Note: The pipeline is compatible with any image classification dataset that follows the same folder structure as
data/dataset/(i.e.,train/,val/, andtest/folders, each containing one subfolder per class with images inside). You can replace the Food101 data with your own dataset as long as you keep this structure.
This project supports the following model architectures out of the box:
-
EfficientNet B0 & B2:
EfficientNet models are known for their excellent balance between accuracy and efficiency, using a compound scaling method to optimize depth, width, and resolution.- B0 is the baseline model, lightweight and fast.
- B2 is slightly larger, offering improved accuracy at a modest computational cost.
-
MobileNet V2:
MobileNetV2 is a lightweight model designed for mobile and embedded vision applications. It uses depthwise separable convolutions and inverted residuals to achieve high efficiency with good accuracy.
You can easily add more architectures by extending the model loading logic in the codebase. The modular design allows for quick integration of any PyTorch-compatible model.
Click here to see the app in action.
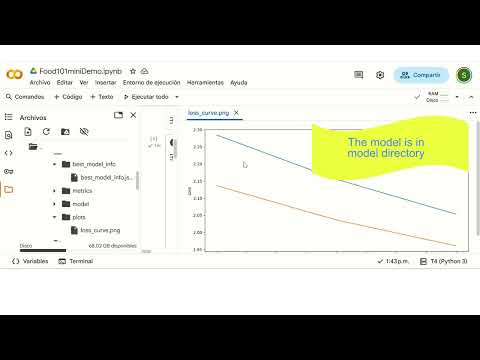
Below are some screenshots of the app in action:


Watch a 10-minute walkthrough of the full pipeline and app usage:
Or click here: Video Demo on YouTube
You can use this project in two ways:
If you just want to try the app with already trained models (no need to run the full pipeline):
-
Clone the repository and install dependencies:
git clone https://github.com/tu_usuario/food101Mini.git cd food101Mini conda create -n food101 python=3.10 conda activate food101 pip install --upgrade pip pip install -r requirements.txt -
Make sure you have the trained models available locally.
The folder
selected_models/must exist on your machine. We included three trained models that can be used for predictions in the whole Food101 dataset. -
Launch the demo app:
make demo
or
streamlit run app.py
Run the entire pipeline from data preparation to model selection and testing using the provided makefile commands. Before runing the pipeline make sure to customize the configurations in the conf folder.
| Command | Description |
|---|---|
make prepare |
Prepare the dataset |
make experiments |
Run all experiments |
make select |
Select top models |
make test |
Test selected models |
make demo |
Launch Streamlit demo (if available) |
make clean |
Remove outputs and logs |
make ui |
Launch MLflow UI |
make help |
Show all available commands |
Example usage:
make prepare
make experiments
make select
make test
make demo
This makes it much easier to run the full pipeline without typing long commands.
The pipeline is highly configurable via YAML files in the conf/ folder.
You can control every stage of the workflow, including advanced training features:
-
Experiments (
conf/experiments.yaml):-
Model selection: Choose architectures, pretrained weights, and number of classes.
-
Train: Set learning rate, batch size, optimizer, epochs, and more.
-
Schedulers:
Use learning rate schedulers (StepLRandReduceLROnPlateau) by specifying the scheduler type and its parameters.
Example:train: scheduler: type: ReduceLROnPlateau # Options: None, ReduceLROnPlateau, StepLR step_size: 5 gamma: 0.5 patience: 2
-
Early stopping:
Enable early stopping to halt training when validation performance stops improving.
Example:train: early_stop_patience: 4
-
Checkpointing:
Automatically saves the best model (based on loss) during training. -
Reproducibility: Set random seeds for deterministic results.
-
-
Model Selection (
conf/select_models.yaml):- Choose how many top models to keep (
top_k). - Select the metric for ranking models (e.g., accuracy, F1, etc.).
- Define source and destination folders for selected models.
- Choose how many top models to keep (
-
Testing (
conf/test.yaml):- Set batch size, device (
cpuorcuda), and which metrics to compute. Example
runs_dir: "selected_models"
batch_size: 32
save_results: true
device: cuda
loss_fn: CrossEntropyLoss
metrics: ["accuracy", "precision_macro", "recall_macro", "f1_macro"]
save_cm_img: False
- Set batch size, device (
All results and artifacts are tracked with MLflow (mlruns/).
If you want to run the full pipeline (starting from data preparation with make prepare), make sure to delete the selected_models/ folder after cloning the repository.
This is important because if selected_models/ exists from a previous run (possibly with different classes), it may cause errors or inconsistencies when preparing a new dataset with different classes.
You can safely remove it with:
rm -rf selected_modelsor on Windows:
rmdir /s /q selected_modelsThen proceed with the pipeline as usual:
make prepare
make experiments
make select
make test
make demoYou can also run the entire pipeline automatically using the provided orchestrator script.
This script will execute all the main steps (prepare, experiments, select, test, etc.) in the correct order.
Simply run:
make runor
python -m scripts.orchestratorThis is especially useful for reproducibility, automation, or when running the pipeline on a new dataset from scratch.
Below is the recommended folder structure for this project.
Note: The data/dataset/ folder (and its subfolders) will not appear until you prepare or generate your dataset locally, since data is not included in the repository.
food101/
├── conf/                # Hydra configuration files
│   ├── experiments.yaml
│   ├── select_models.yaml
│   ├── test.yaml
│   └── ...
├── data/                # Data folder (not versioned, created locally)
│   └── dataset/
│       ├── train/
│       ├── val/
│       └── test/
├── mlruns/              # MLflow logs and artifacts (not versioned)
├── outputs/             # Experiment outputs (not versioned)
├── selected_models/     # Selected/best models
├── scripts/             # Pipeline and utility scripts
│   ├── save_data.py
│   ├── run_experiments.py
│   ├── select_models.py
│   ├── train.py
│   ├── test.py
│   └── orchestrator.py
├── src/                 # Source code
│   ├── models/
│   ├── utils/
│   ├── predictions.py
│   └── st_sections.py
├── app.py               # Streamlit or Gradio app
├── requirements.txt
├── makefile
├── README.md
└── .gitignore
Note:
Folders likedata/dataset/,mlruns/,outputs/, andselected_models/are not included in the repository and will be created automatically as you run the pipeline.
- Launch MLflow UI with
make uifor experiment tracking and exploring all the runs. - Run
make helpfor all available commands. - Add a video demo or screenshots to further enhance your portfolio!