Web UI for monitoring & administering Asynq task queue
Asynqmon is a web UI tool for monitoring and administering Asynq queues and tasks. It supports integration with Prometheus to display time-series data.
Asynqmon is both a library that you can include in your web application, as well as a binary that you can simply install and run.
Please make sure the version compatibility with the Asynq package you are using.
| Asynq version | WebUI (asynqmon) version |
|---|---|
| 0.23.x | 0.7.x |
| 0.22.x | 0.6.x |
| 0.20.x, 0.21.x | 0.5.x |
| 0.19.x | 0.4.x |
| 0.18.x | 0.2.x, 0.3.x |
| 0.16.x, 0.17.x | 0.1.x |
There're a few options to install the binary:
- Download a release binary
- Download a docker image
- Build a binary from source
- Build a docker image from source
You can download the release binary for your system from the releases page.
To pull the Docker image:
# Pull the latest image
docker pull hibiken/asynqmon

# Or specify the image by tag
docker pull hibiken/asynqmon[:tag]To build Asynqmon from source code, make sure you have Go installed (download). Version 1.16 or higher is required. You also need Node.js and Yarn installed in order to build the frontend assets.
Download the source code of this repository and then run:
make buildThe asynqmon binary should be created in the current directory.
To build Docker image locally, run:
make dockerTo use the defaults, simply run and open http://localhost:8080.
# with a binary
./asynqmon

# with a docker image
docker run --rm \
    --name asynqmon \
    -p 8080:8080 \
    hibiken/asynqmon
By default, Asynqmon web server listens on port 8080 and connects to a Redis server running on 127.0.0.1:6379.
To see all available flags, run:
# with a binary
./asynqmon --help

# with a docker image
docker run hibiken/asynqmon --help
Here's the available flags:
Note: Use --redis-url to specify address, db-number, and password with one flag value; Alternatively, use --redis-addr, --redis-db, and --redis-password to specify each value.
| Flag | Env | Description | Default |
|---|---|---|---|
--port(int) |
PORT |
port number to use for web ui server | 8080 |
---redis-url(string) |
REDIS_URL |
URL to redis or sentinel server. See godoc for supported format | "" |
--redis-addr(string) |
REDIS_ADDR |
address of redis server to connect to | "127.0.0.1:6379" |
--redis-db(int) |
REDIS_DB |
redis database number | 0 |
--redis-password(string) |
REDIS_PASSWORD |
password to use when connecting to redis server | "" |
--redis-cluster-nodes(string) |
REDIS_CLUSTER_NODES |
comma separated list of host:port addresses of cluster nodes | "" |
--redis-tls(string) |
REDIS_TLS |
server name for TLS validation used when connecting to redis server | "" |
--redis-insecure-tls(bool) |
REDIS_INSECURE_TLS |
disable TLS certificate host checks | false |
--enable-metrics-exporter(bool) |
ENABLE_METRICS_EXPORTER |
enable prometheus metrics exporter to expose queue metrics | false |
--prometheus-addr(string) |
PROMETHEUS_ADDR |
address of prometheus server to query time series | "" |
--read-only(bool) |
READ_ONLY |
use web UI in read-only mode | false |
--basic-auth(string) |
BASIC_AUTH |
enable HTTP basic authentication if username:password is provided | "" |
To connect to a single redis server, use either --redis-url or (--redis-addr, --redis-db, and --redis-password).
Example:
$ ./asynqmon --redis-url=redis://:mypassword@localhost:6380/2

$ ./asynqmon --redis-addr=localhost:6380 --redis-db=2 --redis-password=mypassword
To connect to redis-sentinels, use --redis-url.
Example:
$ ./asynqmon --redis-url=redis-sentinel://:mypassword@localhost:5000,localhost:5001,localhost:5002?master=mymasterTo connect to a redis-cluster, use --redis-cluster-nodes.
Example:
$ ./asynqmon --redis-cluster-nodes=localhost:7000,localhost:7001,localhost:7002,localhost:7003,localhost:7004,localhost:7006The binary supports two flags to enable integration with Prometheus.
First, enable metrics exporter to expose queue metrics to Prometheus server by passing --enable-metrics-exporter flag.
The metrics data is now available under /metrics for Prometheus server to scrape.
Once the metrics data is collected by a Prometheus server, you can pass the address of the Prometheus server to asynqmon to query the time-series data.
The address can be specified via --prometheus-addr. This enables the metrics view on the Web UI.
# with a local binary; custom port and connect to redis server at localhost:6380
./asynqmon --port=3000 --redis-addr=localhost:6380

# with prometheus integration enabled
./asynqmon --enable-metrics-exporter --prometheus-addr=http://localhost:9090

# with Docker (connect to a Redis server running on the host machine)
docker run --rm \
    --name asynqmon \
    -p 3000:3000 \
    hibiken/asynqmon --port=3000 --redis-addr=host.docker.internal:6380

# with Docker (connect to a Redis server running in the Docker container)
docker run --rm \
    --name asynqmon \
    --network dev-network \
    -p 8080:8080 \
    hibiken/asynqmon --redis-addr=dev-redis:6379
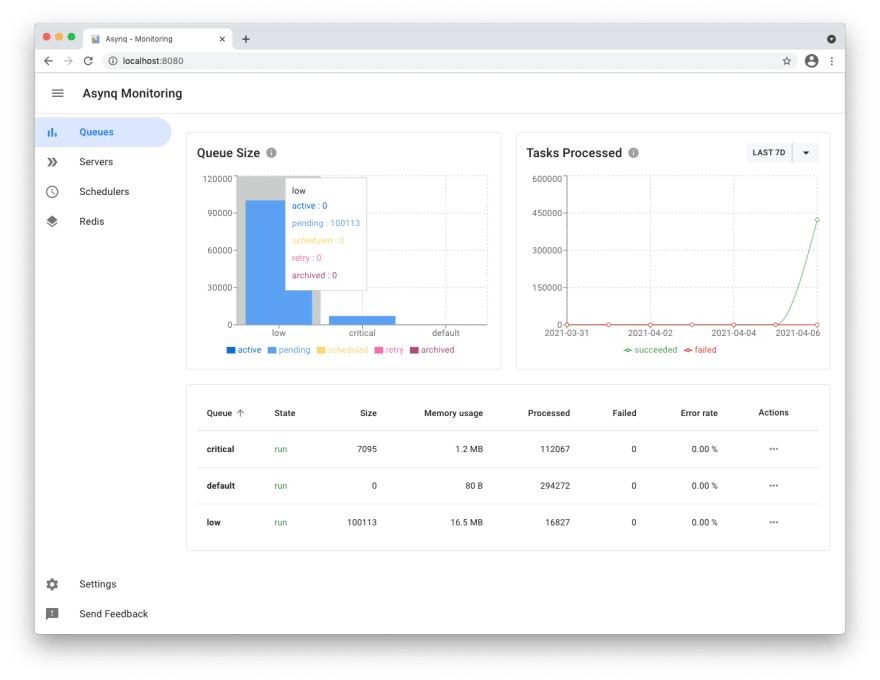
Next, go to localhost:8080 and see Asynqmon dashboard:
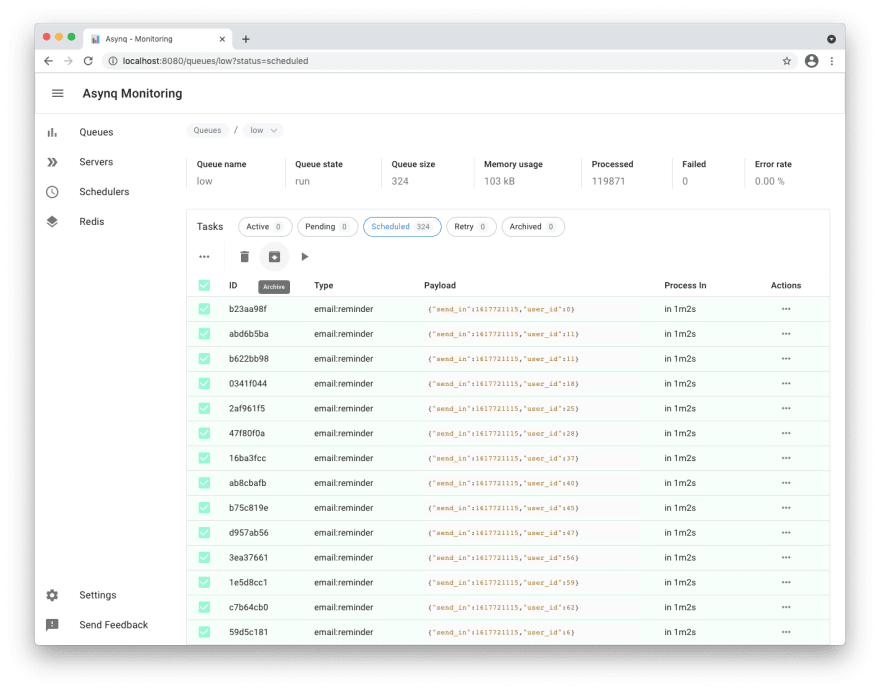
Tasks view
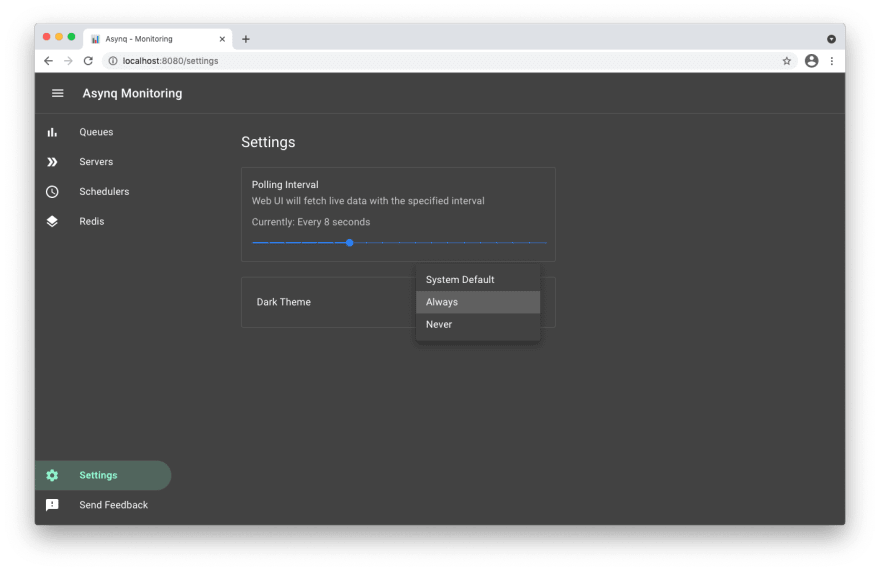
Settings and adaptive dark mode
Asynqmon is also a library which can be imported into an existing web application.
Example with net/http:
package main

import (
	"log"
	"net/http"

	"github.com/hibiken/asynq"
	"github.com/hibiken/asynqmon"
)

func main() {
	h := asynqmon.New(asynqmon.Options{
		RootPath: "/monitoring", // RootPath specifies the root for asynqmon app
		RedisConnOpt: asynq.RedisClientOpt{Addr: ":6379"},
	})

    // Note: We need the tailing slash when using net/http.ServeMux.
	http.Handle(h.RootPath()+"/", h)

	// Go to http://localhost:8080/monitoring to see asynqmon homepage.
	log.Fatal(http.ListenAndServe(":8080", nil))
}
Example with gorilla/mux:
package main

import (
	"log"
	"net/http"

	"github.com/gorilla/mux"
	"github.com/hibiken/asynq"
	"github.com/hibiken/asynqmon"
)

func main() {
	h := asynqmon.New(asynqmon.Options{
		RootPath: "/monitoring", // RootPath specifies the root for asynqmon app
		RedisConnOpt: asynq.RedisClientOpt{Addr: ":6379"},
	})

	r := mux.NewRouter()
	r.PathPrefix(h.RootPath()).Handler(h)

	srv := &http.Server{
		Handler: r,
		Addr:    ":8080",
	}

	// Go to http://localhost:8080/monitoring to see asynqmon homepage.
	log.Fatal(srv.ListenAndServe())
}Copyright (c) 2019-present Ken Hibino and Contributors. Asynqmon is free and open-source software licensed under the MIT License. Official logo was created by Vic Shóstak and distributed under Creative Commons license (CC0 1.0 Universal).


