Note: I'm on a Mac
First off, if you have a fresh macbook, the first things to get are:
- Homebrew
- iTerm2
- Zsh
The missing package manager for macOS and the essential tool for any developer.
Press ⌘ + space and type terminal and press <enter>. A new terminal session should be up. In terminal paste the following:
ruby -e "$(curl -fsSL https://raw.githubusercontent.com/Homebrew/install/master/install)"Note: Command Line Tools for Xcode is a dependency for this action, which can be obtained through App Store Updates.
A terminal emulator for macOS that does amazing things.
With homebrew installed, we can install iTerm via brew install (taps homebrew/cask):
brew install iterm2Press ⌘ + space, type iterm, and press <enter>. You are now using iTerm!
Zsh (or Z shell) is a much more powerful shell than Bash, so let's get it! Specifically, Oh My Zsh - which is an open-source framework for managing ZSH configs.
brew install zsh zsh-completions
sh -c "$(curl -fsSL https://raw.githubusercontent.com/robbyrussell/oh-my-zsh/master/tools/install.sh)"
Don't forget to update the .zshrc with the /usr/local/bin to your $PATH environmental variable:
echo 'export PATH="/usr/local/bin:$PATH"' >> ~/.zshrc
Note: Doing the above tells the system to use programs installed by Homebrew, rather than the OS default, if exists.
IDEs
- Atom
brew install atom - VSCode
brew install visual-studio-code- preferred - Sublime
brew install sublime-text
Git workflow visualizer
- SourceTree
brew install sourcetree - Sublime Merge
brew install sublime-merge
Testing/Debugging
- Postman
brew install postman - Charles
brew install charles
Web browsers
- Google Chrome
brew install google-chrome - Google Chrome Canary
brew install google-chrome-canary - Vivaldi
brew install vivaldi - Brave Browser
brew install brave-browser
Window manager
- Spectacle
brew install spectacle
Communication
- Slack
brew install slack - IrcCloud
brew install irccloud
Agile
- Trello
trello.com - Harvest
brew install harvestfor time-tracking
Markdown editor
- Typora
brew install typora
DB GUI
- Postico (for postgreSQL)
brew install postico
Credential Management
- 1Password
brew install 1password - MacPass
brew install macpass
Misc
- Flux
brew install flux(this feature is built-in to newer MacOS) - Duet
brew install duetfor dual screen set-up - Charles Proxy
brew install charlesfor viewing all HTTP(S) incoming and outgoing traffic
To remove the delete key delay
defaults write NSGlobalDomain KeyRepeat -int 0
defaults write NSGlobalDomain InitialKeyRepeat -int 0
defaults write -g ApplePressAndHoldEnabled -bool false
While you can use Mac OS's Keychain Access app to generate a password or test the strength of a password, it's not nearly as cool as doing it in terminal- and at the time of this writing, there is no way to generate a memorable password with the native app.
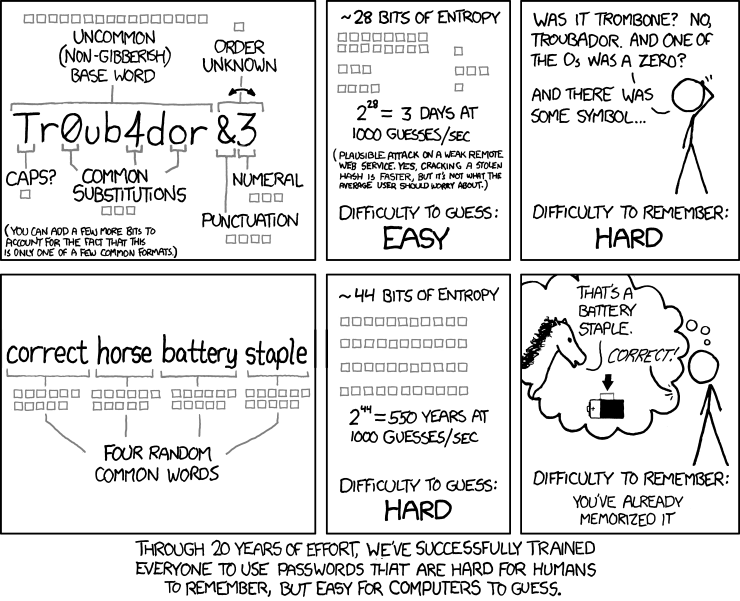
Memorable passwords are easier to remember than traditional passwords as they are a random collection of commonly used english words. There are many way to create memorable passwords, below are two ways.
- Install
shuf
brew install coreutils- Use
shuflike so:
shuf -n4 /usr/share/dict/words | xargs echo | pbcopy && pbpasteThe above will output the generated password and also copy it to clipboard. Just paste (⌘ + v) the password where necessary.
To adjust complexity of password, change the number following -n, for example -n4 outputs 4 words, where as -n5 would output 5 words so it has higher entropy, increasing guess difficulty. An argument of -n3 outputs 3 words, therefore decreases complexity and guess difficulty. At the time of this writing
To hide the password output in the CLI, remove && pbpaste from the above script.
Option 2: Using xkcdpass
- Install
xkcdpass
pip install xkcdpass
- Running
xkcdpass
$ xkcdpass
> pinball previous deprive militancy bereaved numeric
For more, see https://github.com/redacted/XKCD-password-generator#running-xkcdpass
