Unreal Engine without additional app
Important! This feature only works on 64bits Windows!
This is an experimental feature. Might have a lot of bug.
Please open an issue if you face any problems
- Download the latest release of phiz-plugin-embedded for your Unreal version. Unzip it.
- Copy the Plugins folder into your { project root } ({ project root } is usually at Documents/Unreal Project/Project Name/)
- Copy everything in the Content folder into your project Content folder ({ project root }/Content/)
The assets includes prebuild assets for metahuman. It'll only takes you 10 seconds to set it up.
-
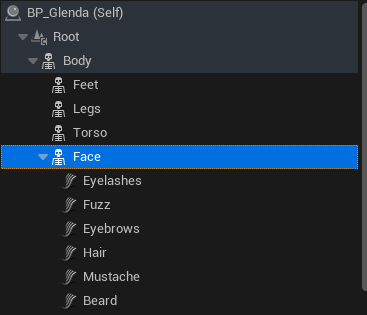
Open your metahuman blueprint and navigate to Face component.
-
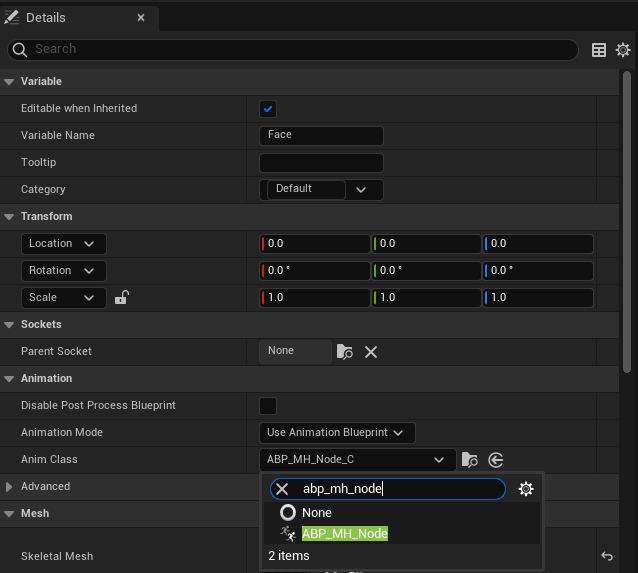
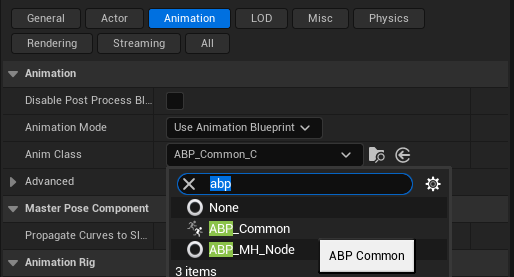
In the details panel, find the Animation section and set the following.
- Animation Mode: Use Animation Blueprint
- Anim Class: ABP_MH_Node
-
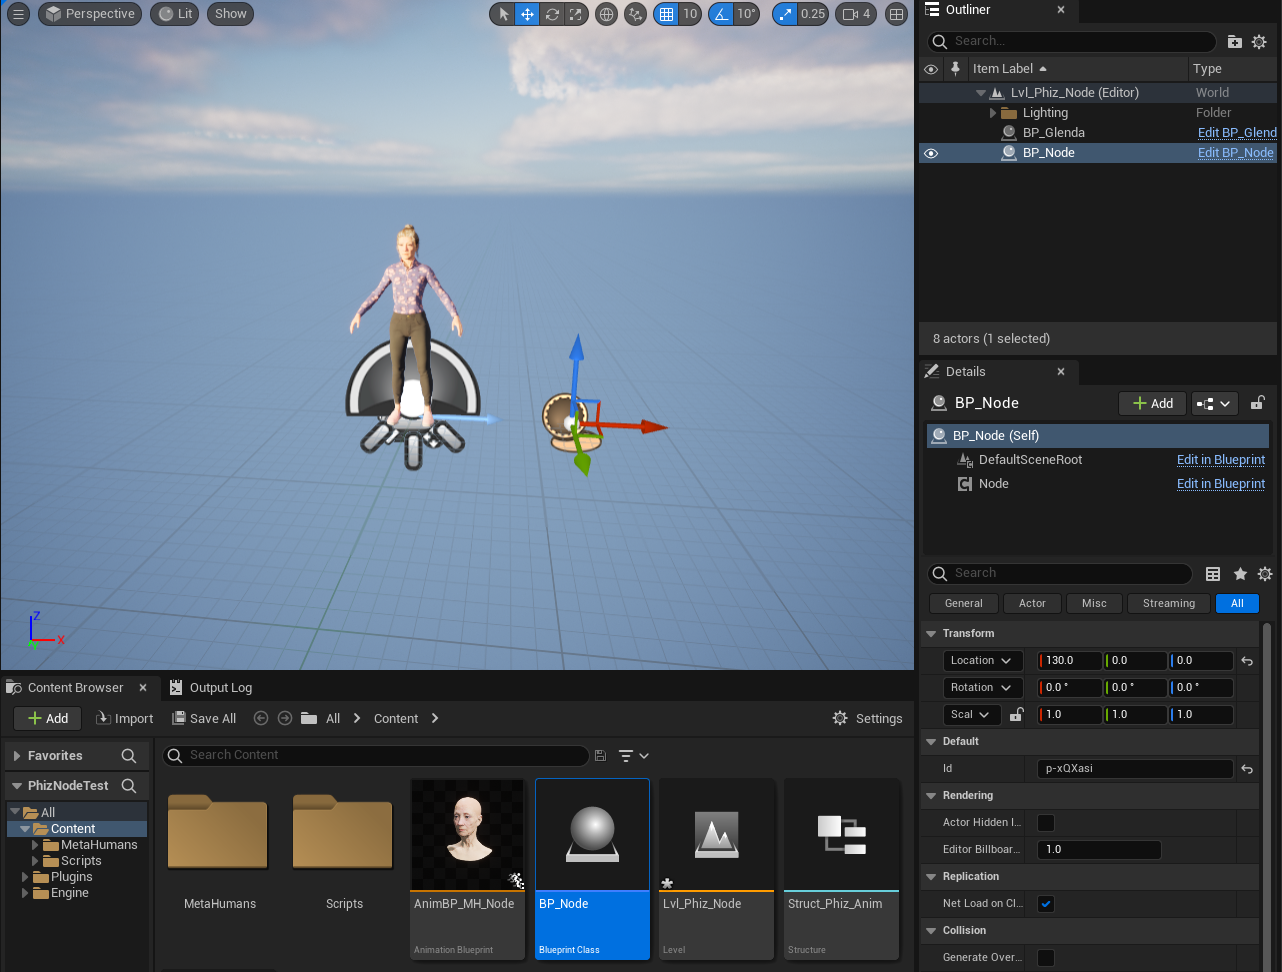
Go back to your level and drag BP_Node in the PhizAssets folder into your level
Check Mocap time!!! for running the scene.
This is a step-by-step guide for controlling a skeletal mesh.
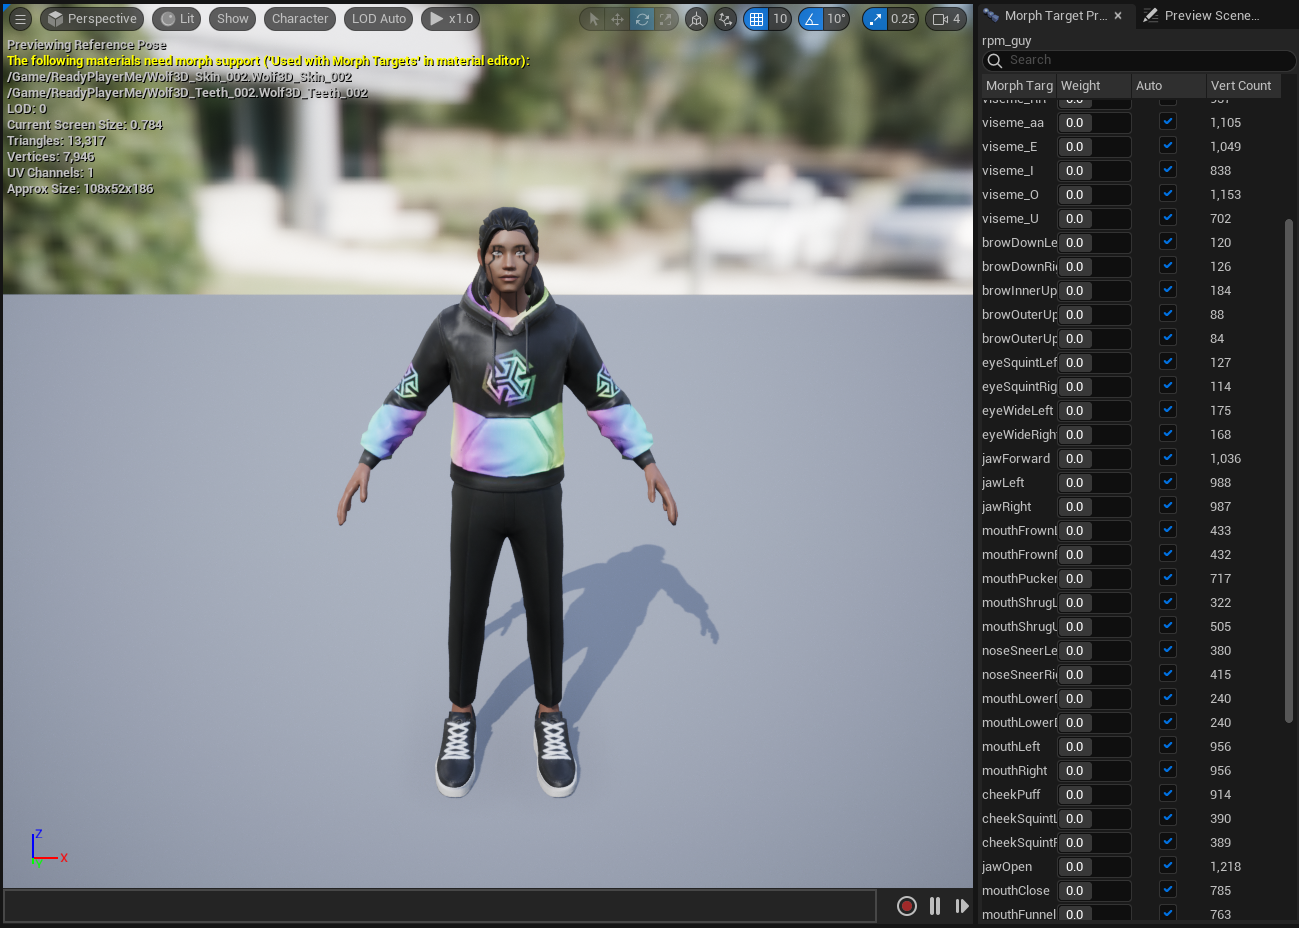
In this example we are using this skeletal mesh that contains arkit-compatible morph targets(blendshapes) created in Ready Player Me.
The finished blueprint is available in the PhizAssets folder named ABP_Common_Node. Here is a step-by-step guide of creating it.
-
First create a new Animation Blueprint. Then select your skeleton as the target.

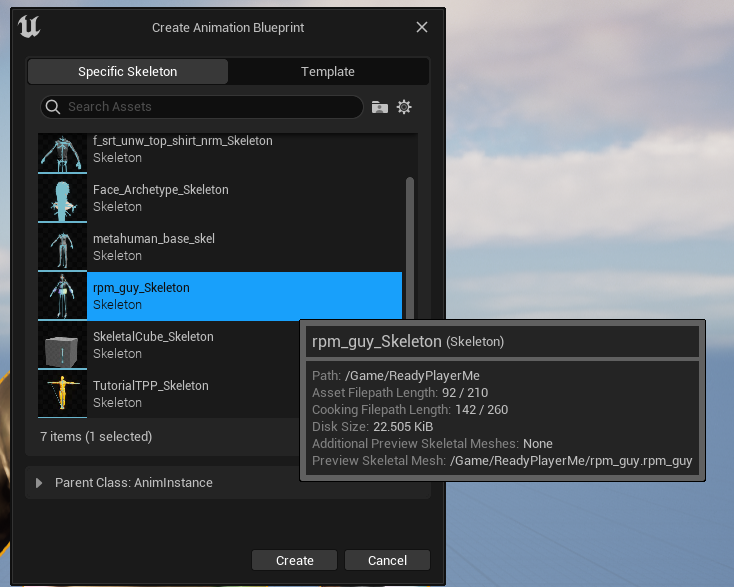
-
Click on the newly created animation blueprint and navigate to the event graph. We are going to receive the mocap data here and control our animation using it.
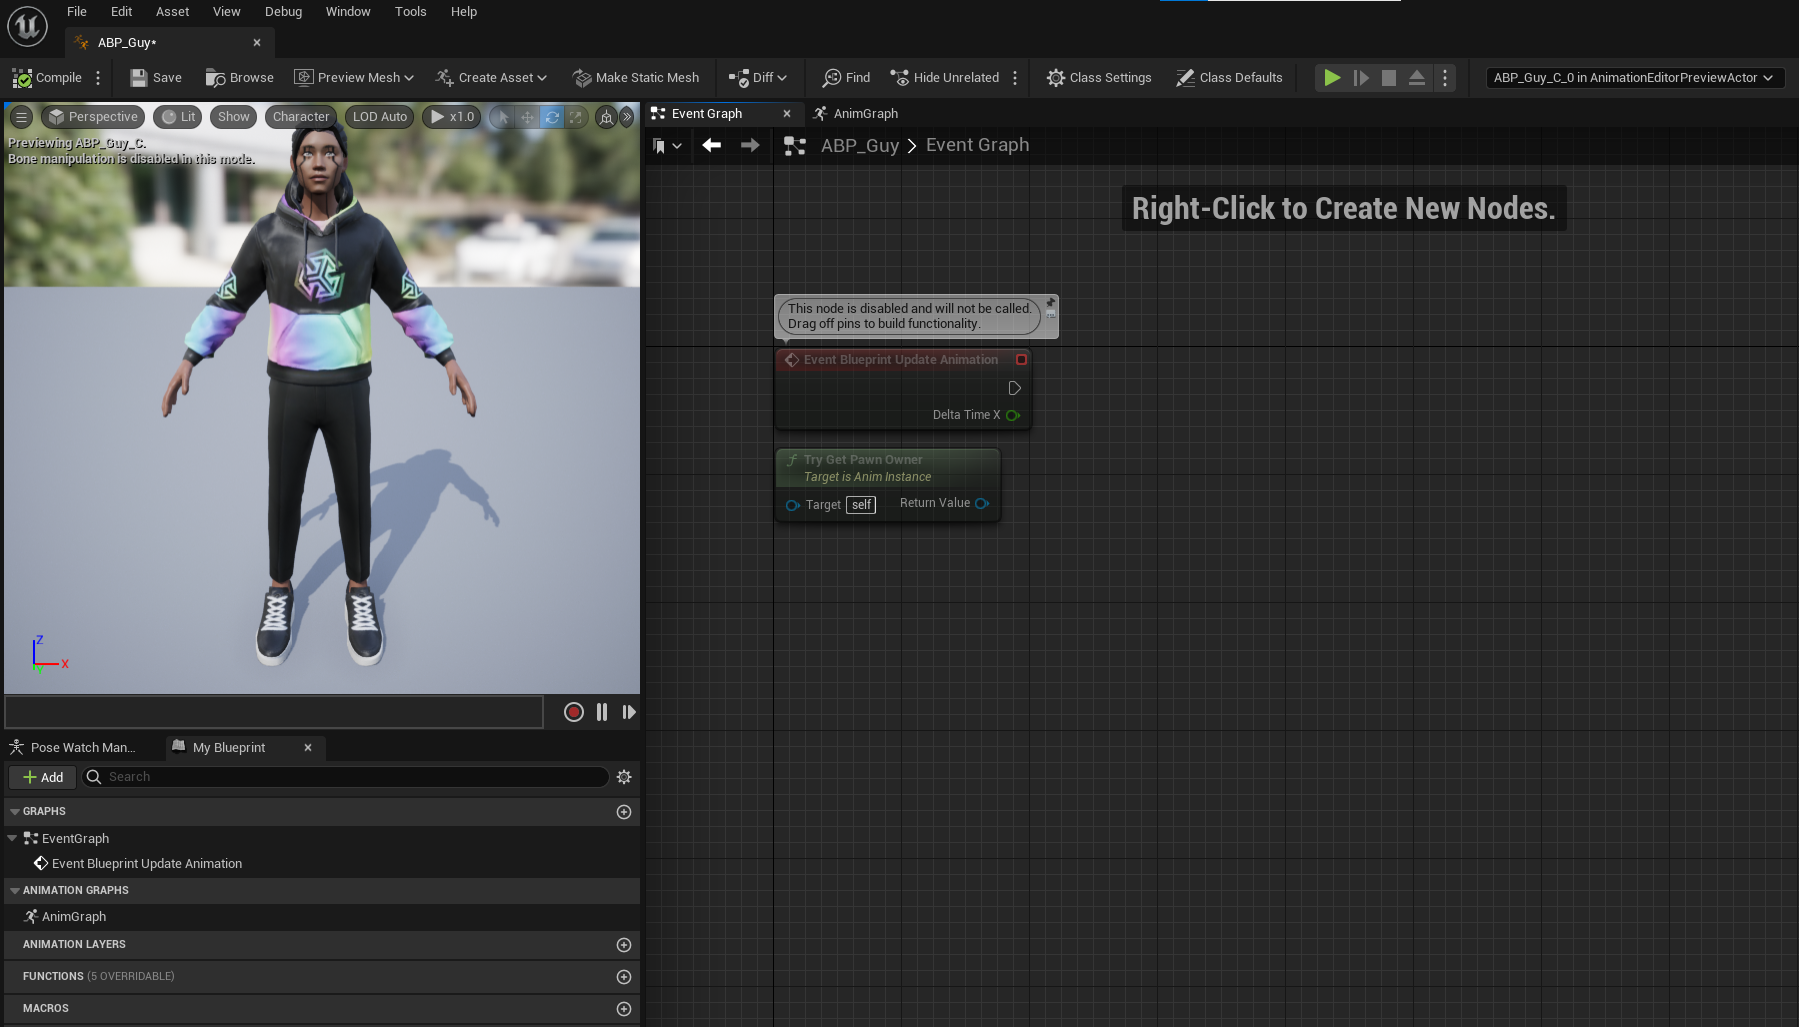
-
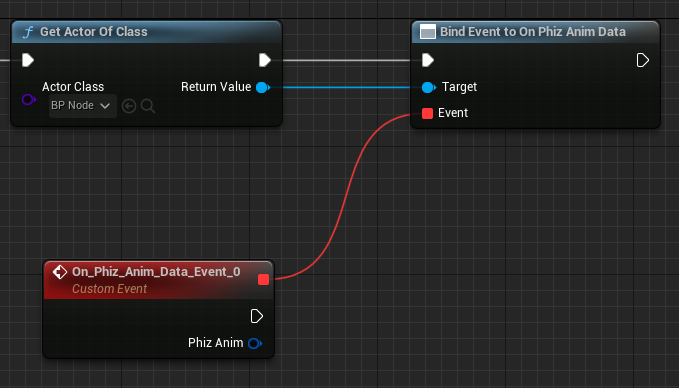
Add a get actor of class node and search for "BP_Node".
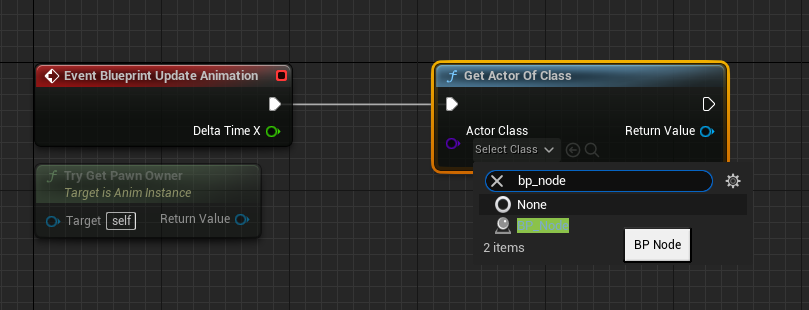
-
Drag from the execution pin of the "Get Actor of Class" node and search for "Assign on phiz".
 Connect the Return Value of "Get Actor of Class" and the "Target" of the node we just created.
-
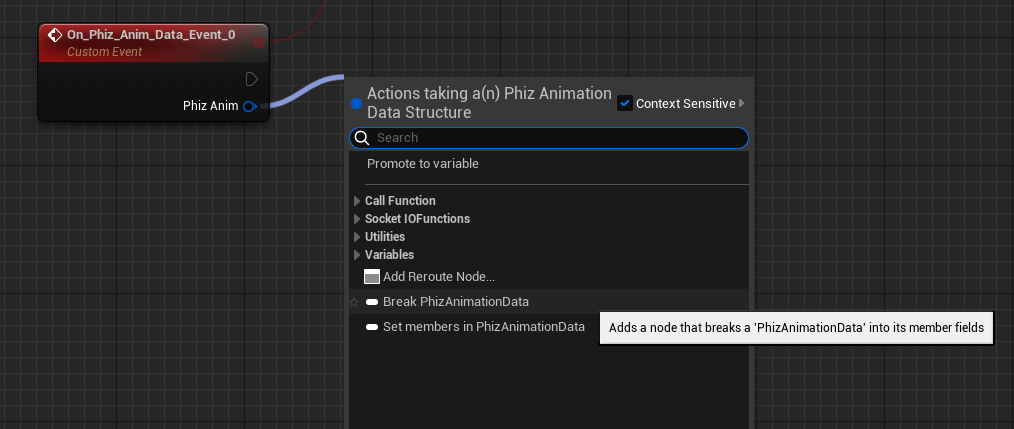
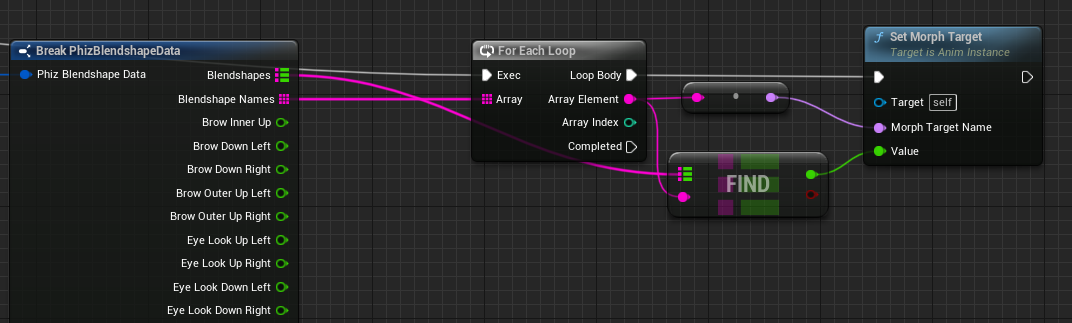
Drag from the "Phiz Anim" pin and select "Break PhizAnimationData". Then drag our the "Blendshape Data" pin and select "Break PhizBlendshapeData"
Here is how the graph should look like at this point.
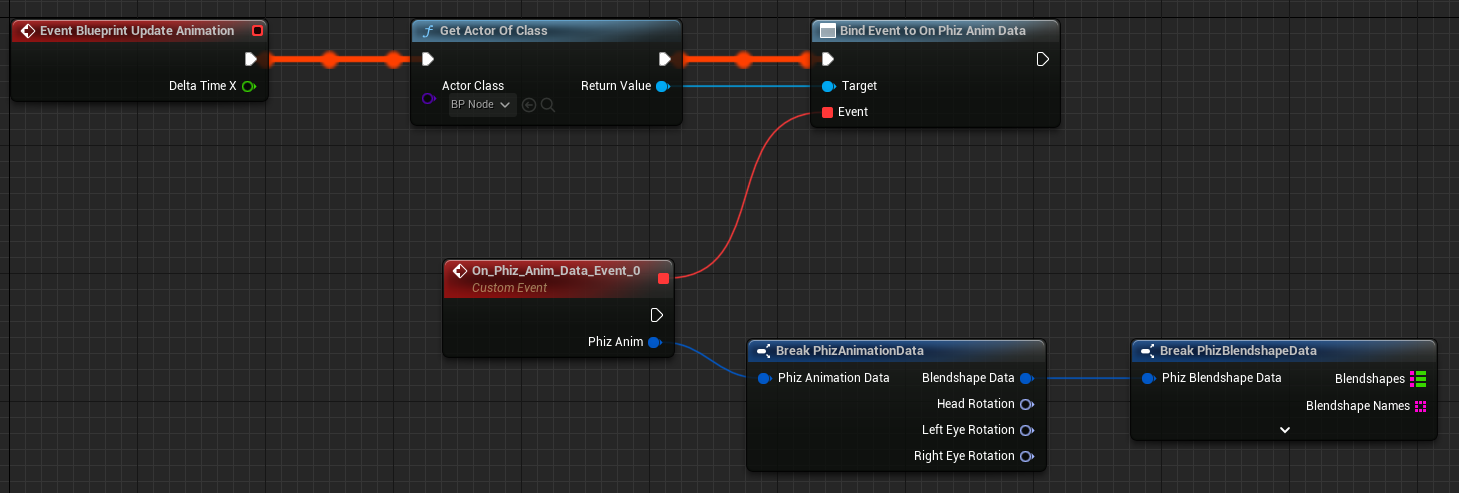 We now have access to all 52 blendshapes value and also the head rotation by all the new nodes we just created.
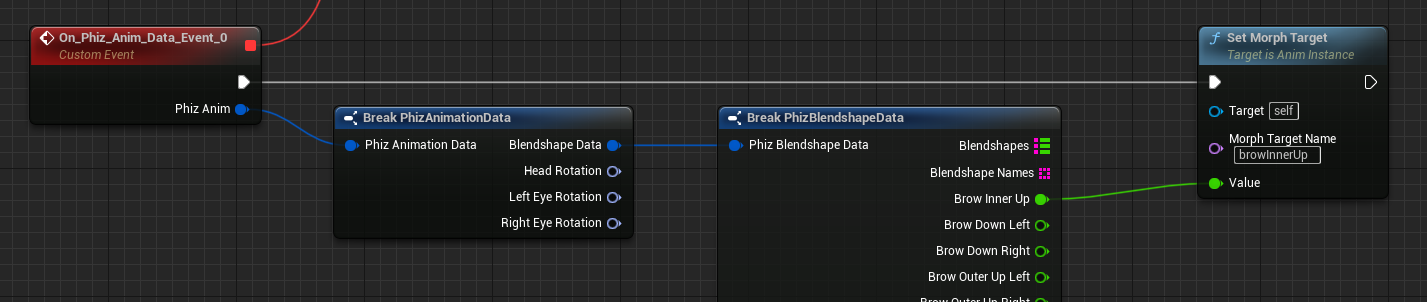
In this example, we use the "Set Morph Target" to control our specific character. Please use suitable nodes for your specific character.
- Add a "Set Morph Target" node and type in the name of the morph target you want to control. Connect the corresponding pin from PhizBlendshapeData. Don't forget to also connect the execution pin from "On_Phiz_Anim_Data_Event_0" to "Set Morph Target".
If you find connecting 52 nodes manually is tiring and tedious, don't worry! The PhizBlendshapeData also provide the values in the form of map and also a string array of all the blendshape names order.
Using these two elements, we can loop through the names, find their corresponding value in the map and assign it to our animation morph targets.
-
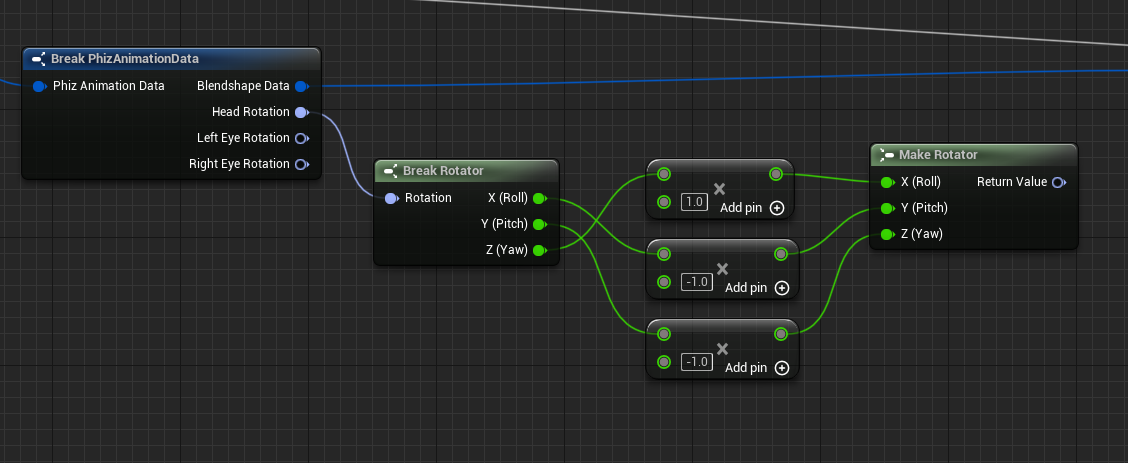
Next we are going to setup the head rotation. In the example's case, the rotation coordinate doesn't match the data's. So we have to break and remake the rotator.
-
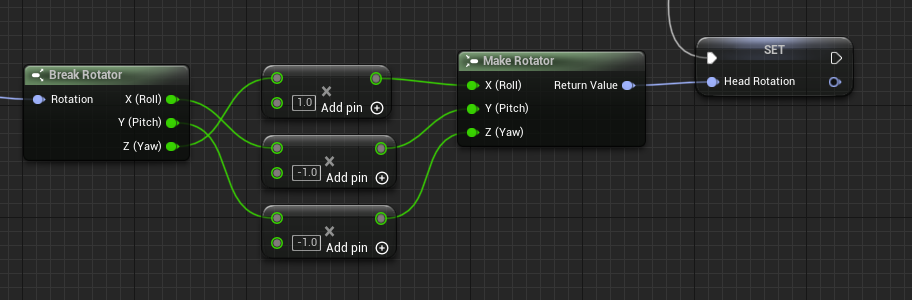
Then we create a rotator variable and set it's value.

-
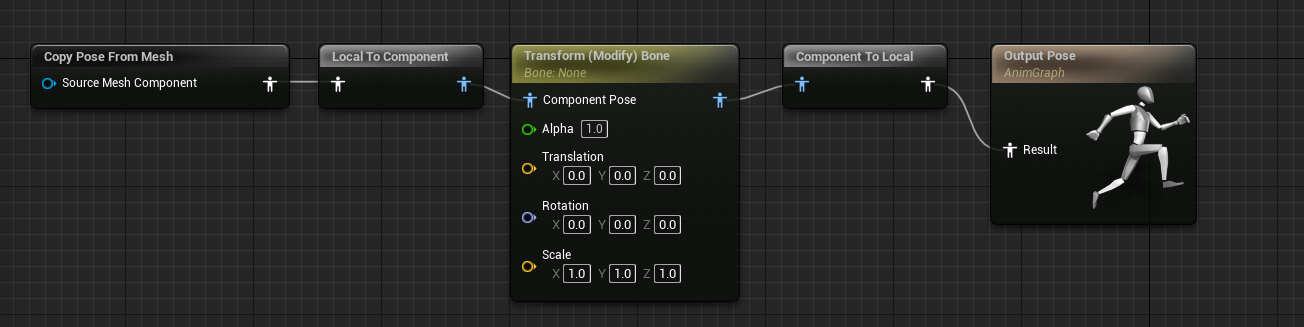
Now move to the AnimGraph and add a "Copy Pose From Mesh" node and "Transform Modify Bone" node. Connect all of the nodes and unreal should automatically convert the pose input output data.
-
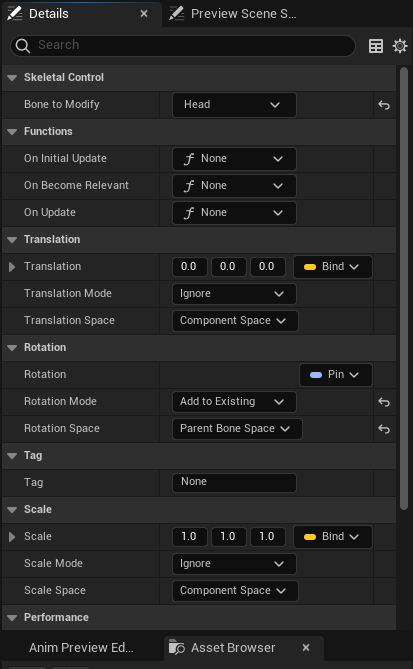
Click on the "Transform Modify Bone" node. In the detail panel set the value as the following.
- Bone to Modify: Head
- Rotation Mode: Add to Existing
- Rotation Space: Parent Bone Space
-
Get our headrotation variable and connect it to the transform bone node.
Now the animation blueprint is finished, lets go back to our level.
-
Drag the character and BP_Node in the PhizAssets folder into the scene.

-
In the details panel of the SkeletalMeshActor, find the animation section and set it as the following
- Animation Mode: Use Animation Blueprint
- Anim Class: The blueprint we just created or ABP_Common_Node
Go to Phiz Website on your prefer device.
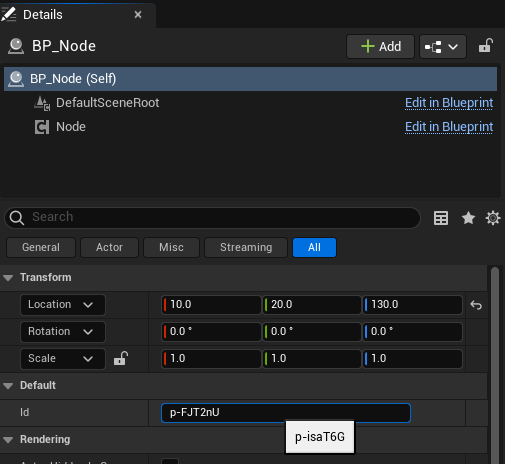
Click on the BP_Node. Find the id column and paste the 8 character code the website gave you (ig, p-xxxxxx)
Press play! If this is the first time running, accept the prompt popup asking for Node js access.
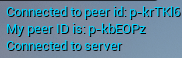
If you see texts printed out like the following picture in you scene you should see your metahuman moving :)
Important! Due to a unsolved bug in the dependency NodeJs-Unreal, the first time you play the scene after you open the editor, there might be nothing happen and you will see error log like this in the output log.

If this happens, just stop the scene and replay it again. It should be working from now on until next time you close your editor
-
Nothing happens when I clicked play what's wrong?
Play the scene again. (Might be the bug described in the Mocap Section) Or check the unreal log to see what's run.
-
Everything is connected but my metahuman isn't moving
Are you active on the website right now? If you are on mobile and accidentally turn off your screen, refresh the page and paste the new code again.
-
No ID set
You forgot to put your ID in the BP_Node
-
The log says outdated version Please download the latest release.