This custom component gathers regular and special meteo alerts from met.hu (valid only for Hungary).
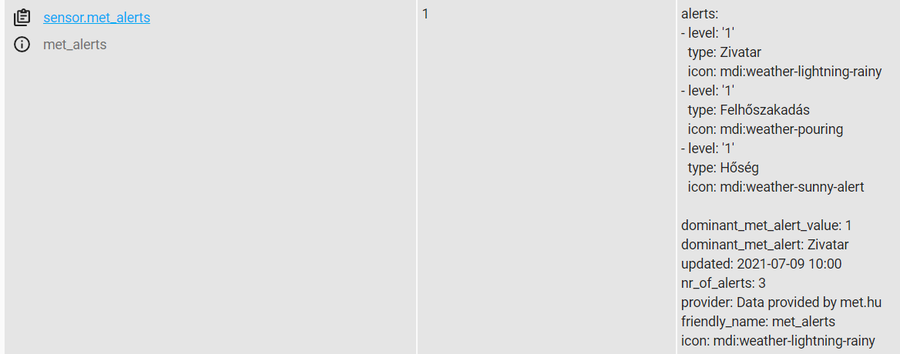
The state of the sensor will be the highest current alert level. The name of the alert with highest alert level will also be added into a dedicated attribute.
The sensor will also report in attributes the values of all other meteo alerts and/or forecasts from next 12-24 hours, if there are any.
The easiest way to install it is through HACS (Home Assistant Community Store),
search for MET Alerts Hungary in the Integrations.
Define sensor with the following configuration parameters:
| Name | Optional | Default |
Description |
|---|---|---|---|
| name | Y | met_alerts_hu |
name of the sensor |
| region_id | Y | `` | region identifier |
| county_id | Y | `` | county identifier |
| lang | Y | hu |
language tag |
region_id can be found as kt value in the URL when hovering on the region at MET Vészjelzés. When set it will report the current weather alerts.
county_id can be found as serial value of the county when counties are sorted alphabetically (1: reserved, 2: Baranya;...; 20: Zala). When set it will report the special meteo conditions e.g. forecasts from next 12-24 hours.
Language tag should follow IANA subtag registry. met.hu currently supports only hu and en.
If you don't want to combine the two (weather alerts and forecasts) but still want to have both information, define two sensors, one with region_id set and one with county_id set.
sensor:
  - platform: met_alerts_hu
    name: 'MET alerts'
    region_id: 101 # Budapest
    county_id: 13 # Pest county
    lang: hu
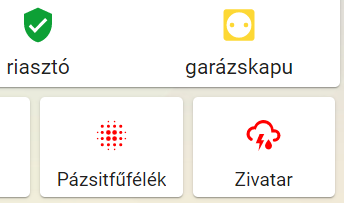
The following example displays the dominant alert and makes use of the non-standard custom button card (thus needs to be installed first via HACS->Frontend):
type: conditional
conditions:
  - entity: sensor.met_alerts
    state_not: '0'
card:
  type: custom:button-card
  size: 30px
  styles:
    label:
      - font-size: 90%
    card:
      - height: 80px
    icon:
      - color: >
          [[[
            var met_level = states['sensor.met_alerts'].state;
            if ( met_level == 0 ) {
              return "green";
            } else if ( met_level == 1 ) {
              return "var(--paper-item-icon-active-color)";
            } else if ( met_level == 2 ) {
              return "orange";
            } else if ( met_level == 3 ) {
              return "red";
            }
            return "black";
          ]]]
  label: >
    [[[
      var met_alert = states['sensor.met_alerts'].attributes.dominant_met_alert;
      return met_alert;
    ]]]
  show_label: true
  show_name: false
  entity: sensor.met_alerts
  color_type: icon
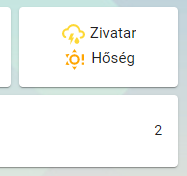
The following example displays all alerts and it also makes use of the non-standard custom buitton card (please note that this height of the card will allow only three alerts to be shown):
type: conditional
conditions:
- entity: sensor.met_alerts
state_not: '0'
card:
type: custom:button-card
size: 30px
styles:
label:
- font-size: 90%
card:
- height: 80px
label: >
[[[
var label = ""
var icolor = "black"
var met_alerts = states['sensor.met_alerts'].attributes.alerts;
for (var k=0; k < states['sensor.met_alerts'].attributes.nr_of_alerts; k++) {
if ( met_alerts[k].level == 1 ) {
icolor = "var(--paper-item-icon-active-color)";
} else if ( met_alerts[k].level == 2 ) {
icolor = "orange";
} else if ( met_alerts[k].level == 3 ) {
icolor = "red";
}
label += `<ha-icon icon="` + met_alerts[k].icon +
`" style="width: 28px; height: 28px; color:` + icolor +
(states['sensor.met_alerts'].attributes.nr_of_alerts == 1 ? `; margin-bottom: 10px;">` : `;">`) +
`</ha-icon> ` +
(states['sensor.met_alerts'].attributes.nr_of_alerts == 1 ? `<br>` : ``) +
`<span>` + met_alerts[k].type + `</span><br>`;
}
return label;
]]]
show_label: true
show_name: false
show_icon: false
entity: sensor.met_alerts
color_type: icon
Thanks to all the people who have contributed!


