
This is a plugin for Obsidian. It adds events from calendar/ics URLs to your Daily Note on demand.
This is designed to work with the Daily Note or Periodic Notes plugins: specifically it gets the date to search for events during from the currently open daily note. You can use it through Dataview or Templater for more advanced / customized usage.
I highly recommend pairing this with the Day Planner plugin: the output format is tuned to support it and you'll get support for seeing the day and week planners.
There are many calendar integration plugins available for Obsidian, some with more features and bells and whistles. This plugin focuses on a different philosophy: clean, maintainable code that adapts to user expectations rather than forcing users to adapt to the plugin.
Key advantages of this approach include:
- User-Friendly API: The
getEvents()method accepts date strings, moment objects, or Date objects - whatever is most natural for your use case - Performance Through Simplicity: Support for vdir (local calendar cache) enables lightning-fast workflows by treating your local calendar files as a cache
- Power User Friendly: Designed for customization and automation through Templater and Dataview rather than trying to be everything to everyone
- Focused Feature Set: Does one thing well - importing calendar events into notes - rather than trying to be a full calendar management system
- Predictable Behavior: Clean, testable code that behaves consistently across different environments
If you value simplicity, performance, and the ability to customize your calendar integration exactly how you want it, this plugin might be a good fit for your workflow.
This plugin is in the community plugin browser in Obsidian. Search for ICS and you can install it from there.
- From Google Calendar, look on the left-hand side for the "My Calendars" section.
- Within that list, find the Calendar that you want to integrate into Obsidian.
- Click on the Three Dots Menu (on the right of the calendar name), then click on 'Settings'.
- Once on the Settings Page, you should find yourself on the specific calendar's "Settings for my calendars" view. On the left-hand side of the page, click the "Integrate Calendar" button.
- On this page, click on the "copy" button next to the "Secret Address in iCal Format". Google Calendar will give you a warning about not sharing it with anyone.
- From Outlook Web App, click the gear in the upper right to open the settings panel
- Select Calendar on the left, then Shared Calendars in the middle
- In the Publish a Calendar section, select the calendar and permissions you want based on the data you want Obsidian to have access to.
- Click Publish
- Copy the ICS URL
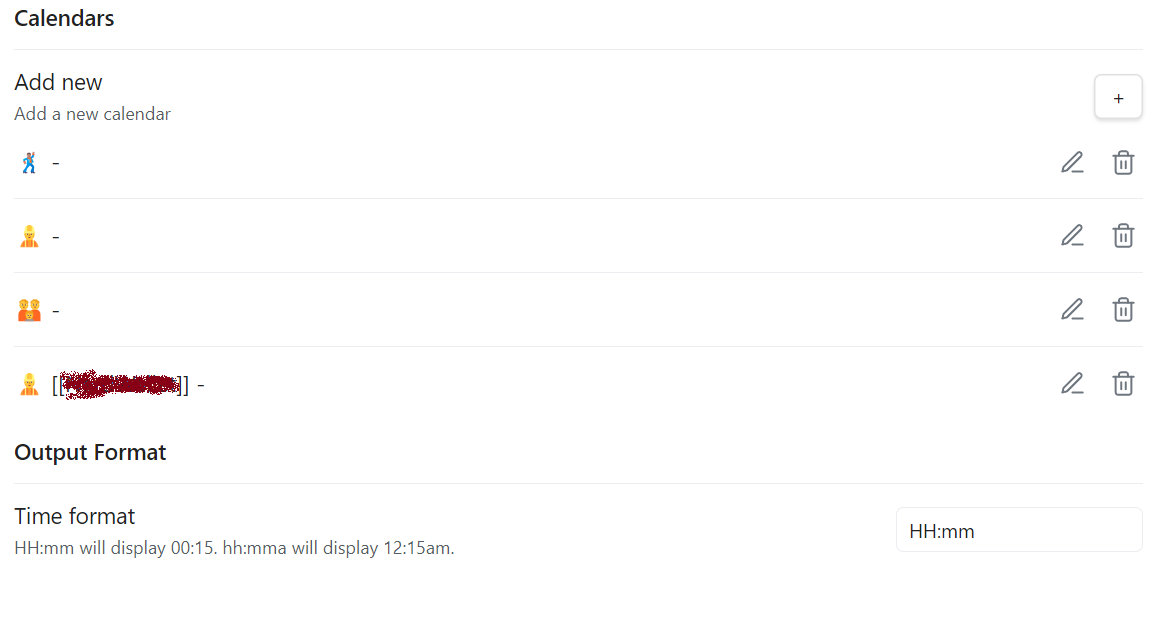
- Click the "+" button to add a new calendar.
- Choose a name for the calendar, select "Calendar Type" as "Remote URL", and then paste the Secret Address URL into the box labeled "Calendar URL".
- Customize your format settings for the specific calendar. These tie to the Output Format for that specific calendar: whether to include a checkbox for each scheduled item, the event end time, the calendar name, event summary, event location, event description
- Click "Save" at the bottom of the specific Calendar's view.
- On the main ICS page, select your time format and whether to emit start and end times as Dataview Metadata. See the below screenshot.
- Once you've done all of this, use the
ICS: Import eventscommand. If it shows nothing, check to make sure your iCal URL is the secret URL as that commonly is the issue.
The plugin can extract custom fields from calendar events using configurable patterns. This powerful feature allows you to extract any text data and organize it into named fields.
✨ New in this version: This expands the previous video call URL extraction feature into a fully generic system. Your existing templates using
callUrlandcallTypecontinue to work unchanged, but you now have access to much more powerful extraction capabilities throughextractedFields.
- Flexible Patterns: Use simple text matching or regular expressions
- Custom Field Names: Extract data into any field name you choose
- Multiple Matches: Each field can contain multiple extracted values
- Priority-Based: Patterns are processed in priority order
By default, the plugin extracts video call URLs into the "Video Call URL" field:
- Google Meet: Detected from
GOOGLE-CONFERENCEfield - Zoom: URLs containing
zoom.us - Skype: URLs matching
https://join.skype.com/pattern - Microsoft Teams: Teams meeting URLs
You can create patterns to extract any information:
- Additional Video Calls: Extend beyond the defaults:
- WebEx:
webex.com→ "Video Call URLs" field - GoToMeeting:
gotomeeting.com→ "Video Call URLs" field - Jitsi:
meet.jit.si→ "Video Call URLs" field
- WebEx:
- Links:
(https?|ftp|file)://[^\s<>"]+→ "Links" field - Phone Numbers: Create multiple patterns for the same field:
- US format:
\(?\d{3}\)?[-.\s]?\d{3}[-.\s]?\d{4}→ "Phone Numbers" field - International:
\+\d{1,3}[-.\s]?\d{1,14}→ "Phone Numbers" field
- US format:
- Meeting IDs:
Meeting ID: (\d+)→ "Meeting IDs" field
-
Pattern Types:
- Contains: Simple text matching (e.g., "zoom.us")
- Regex: Full regular expression support with capture groups
-
Pattern Management:
- Set priority (lower numbers are checked first)
- Assign custom field names
- Delete patterns you don't need
- Reset to defaults if needed
- Real-time validation for regex patterns
Legacy Support (Backward Compatible):
callUrlandcallTypecontinue to work for existing templates- These map to the first "Video Call URL" extraction for compatibility
New Approach (Recommended):
- Use
extractedFields["Field Name"]to access any extracted data - Each field returns an array of all matching values
- Much more flexible and powerful than the legacy fields
Example:
// Legacy approach (still works but limited)
if (event.callUrl) {
  // Only gets the first video call URL
}

// New approach (recommended)
const videoUrls = event.extractedFields["Video Call URLs"] || [];
const meetingIds = event.extractedFields["Meeting IDs"] || [];
const phoneNumbers = event.extractedFields["Phone Numbers"] || [];

// Handle multiple values
videoUrls.forEach(url => {
  // Process each video call URL
});
💡 Tip: Consider migrating your templates to use
extractedFieldsfor more flexibility and to access all extracted data, not just the first match.
Go to a daily note, use the ICS: Import events command.
For customizations not available to the formatting, use Dataview or Templater (see below). Likewise, if you want to automatically import events when you create your daily notes, you'll want to use one of those. If you have issues using Dataview or Templater, test that your calendar imports works using the ICS: Import events command as there's more error handling available there.
You can also use a Dataview to add your events to your journal notes when they get created.
The getEvents() method accepts flexible date inputs: date strings (like "2025-03-01" or "March 1, 2025"), moment objects, or JavaScript Date objects. This makes it easy to work with whatever date format is most convenient for your use case.
For example, if you use the core Templates plugin you can add the following to add events to your daily note template:
// Simple string-based approach
var events = await app.plugins.getPlugin('ics').getEvents(dv.current().file.name);

// Or use a Date object for today's events
var events = await app.plugins.getPlugin('ics').getEvents(new Date());

// Or use moment for date manipulation
var events = await app.plugins.getPlugin('ics').getEvents(moment().add(1, 'day'));

var mdArray = [];
events.forEach((e) => {
  mdArray.push(`${e.time} ${e.summary} ${e.location}: ${e.description}`.trim())
})
dv.list(dv.array(mdArray))
You can see the available fields in the Event interface.
You can use Templater with flexible date inputs. The getEvents() method now accepts moment objects directly, so you don't need to convert them to strings:
<%*
// Direct moment object usage (recommended)
var events = await app.plugins.getPlugin('ics').getEvents(moment(tp.file.title,'YYYYMMDD'));
events.sort((a,b) => a.utime - b.utime).forEach((e) => {
  tR+=`- [ ] ${e.time} ${e.summary} ${e.location? e.location : ''}\n`
})
%>
If you prefer to use string dates or need to handle different date formats, you can also do:
<%*
// String format (also works)
var events = await app.plugins.getPlugin('ics').getEvents(moment(tp.file.title,'YYYYMMDD').format('YYYY-MM-DD'));
events.sort((a,b) => a.utime - b.utime).forEach((e) => {
  tR+=`- [ ] ${e.time} ${e.summary} ${e.location? e.location : ''}\n`
})
%>
See advanced Templated usage example for an example that demonstrates more features.
You can see the available fields an the Event interface.
Or you can use Full Calendar to render a calendar view of your events. Here's an example of how you can use it:
const { renderCalendar } = app.plugins.getPlugin("obsidian-full-calendar");
const thisWeek = Array.from({length: 7}).map((_, weekday) => moment().set({weekday}).format("YYYY-MM-DD"))
const icsPlugin = app.plugins.getPlugin('ics')
const events = (await icsPlugin.getEvents(...thisWeek))
    .map(event => {
	  const start = moment.unix(event.utime)
	  const [endHours, endMinutes] = event.endTime.split(":")
	  return {
	      start: start.toDate(),
	      end: start.set({hour: endHours, minute: endMinutes}).toDate(),
	      title: event.summary,
	    }
	}
)
renderCalendar(this.container, {events}).render()If you want to try out beta releases, you can use the BRAT plugin.
- Install the BRAT plugin
- Open
Settings->Community Plugins - Disable safe mode, if enabled
- Browse, and search for "BRAT"
- Install the latest version of Obsidian42 - BRAT
- Open
- Open BRAT settings (
Settings->BRAT)- Scroll to the
Beta Plugin Listsection Add Beta Plugin- Specify this repository:
cloud-atlas-ai/obsidian-ics
- Scroll to the
- Enable the
Amazing Marvinplugin (Settings->Community Plugins)
If you want to support my work, you can buy me a coffee
- DST fix from @zakkolar
- Readme improvements and release script cleanup from @fcwheat
- Export event getter function @bvolkmer
- Allow plugin to run on mobile @TopherMan
- Implement customizable output format for events @GoBeromsu
- Documenting Dataview usage @afonsoguerra
- Vdir enhancements @bpannier
- Ensure recurrent flag is set correctly for recurrence overrides @mikeh
- Support multiple days and document Full Calendar usage @ctrl-q
If for some reason you want to install the plugin manually:
- Download the
obsidian-ics-[version].ziprelease file from releases. - Unpack the file. It should create a
obsidian-icsfolder. - Place the folder in your .obsidian/plugins directory
- Activate the
ICSplugin
- To develop Obsidian plugins you need NodeJS and npm installed. Do that first.
npm install- Make the changes you want...
npm run devwill watch for changes and build the plugin todist/main.js.- copy the
dist/main.js(ordist/main-debug.jsif you want the un-minified version) to your Obdisian vault plugin folder (cp dist/main.js <vault>/.obsidian/plugins/ics/main.js). - Reload the vault or use the Hot Reload Plugin.
The plugin includes a test harness for recurring events and timezone handling to prevent regressions:
# Run all tests
npm test

# Run tests in watch mode (automatically re-runs when files change)
npm run test:watch
See tests/README.md for information about how to add new tests.