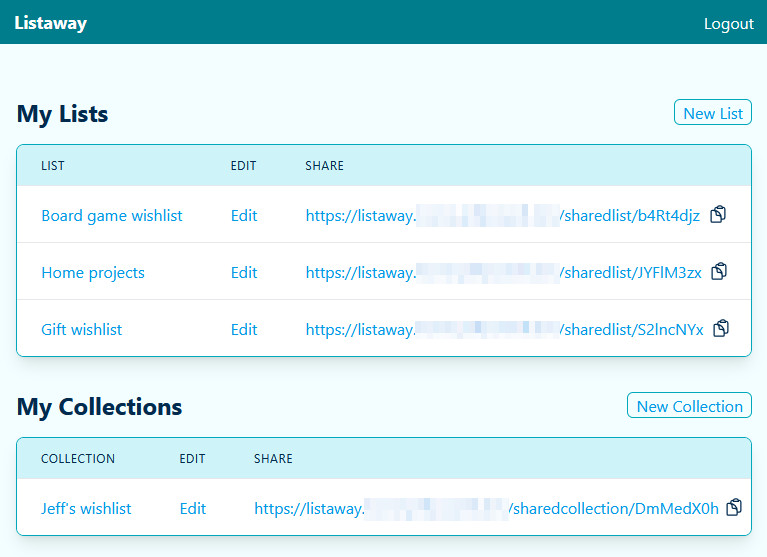
This self-hostable application allows authenticated users (individuals or a team) to publish one or more lists of items publicly. These lists can either be for tracking purposes (e.g. a list of books to read, a list of components in a custom computer build, a list of favorite local places, etc.) or for wishlist purposes (e.g. a gift wishlist, a list of tasks you need help with, etc.). The items can be freeform text or a URL to details about the item. Shared lists incorporate a random string in the URL to give a little protection against guessing (thus allowing you to share the link and access it without requiring authentication).
- Application access
- Authentication / Authorization (Email/Password + OIDC/OAuth2)
- Password reset
- Group administration (manage group of users, including creation)
- Instance administration (manage all groups and all users)
- List management
- CRUD lists
- Optional list description string
- CRUD items (Name, optional URL, optional Priority, optional Notes)
- Table sortable by Name and Priority
- Opt-in public read-only access with randomized URL
- Share read-only or edit access with other group members
- Collection management
- CRUD collections (group of lists, including shared lists)
- Optional collection description string
- Opt-in public read-only access with randomized URL
- Configure your PostgresDB instance
--connect to your postgres server with an admin role
CREATE ROLE listaway LOGIN PASSWORD 'password';
CREATE DATABASE listaway;
GRANT CONNECT ON DATABASE listaway TO listaway;
--connect to your new listaway database with an admin role
CREATE SCHEMA listaway;
GRANT CREATE, USAGE ON SCHEMA listaway to listaway;
GRANT ALL PRIVILEGES ON ALL TABLES IN SCHEMA listaway TO listaway;
GRANT ALL PRIVILEGES ON ALL SEQUENCES IN SCHEMA listaway TO listaway;
- Make a
docker-compose.ymlfile
services:
  listaway:
    image: "ghcr.io/jeffrpowell/listaway:v1.17.1"
    ports:
      - "8080:8080"
    env_file:
- .env- Make a
.envfile
# Required configuration

LISTAWAY_AUTH_KEY=[random alphanumeric 128-character string]
PORT=8080
POSTGRES_USER=listaway
POSTGRES_PASSWORD=password
POSTGRES_HOST=[pghost]
POSTGRES_DATABASE=listaway

# Optional SMTP configuration for password reset emails (defaults will cause email bodies to be logged instead of sent outbound)

# SMTP_HOST=smtp.example.com # default ""
# SMTP_PORT=587              # typically 25, 465, or 587, default 587
# SMTP_USER=username         # default ""
# SMTP_PASSWORD=password     # default ""
# [email protected] # default "[email protected]"
# SMTP_SECURE=true           # default true
# APP_URL=https://listaway.your-domain.com # for reset links, default "http://localhost:8080"

# Optional OIDC/OAuth2 configuration for single sign-on authentication

# OIDC_ENABLED=true                             # default false
# OIDC_PROVIDER_URL=https://accounts.google.com # OIDC provider URL
# OIDC_CLIENT_ID=your-client-id                 # OAuth2 client ID from provider
# OIDC_CLIENT_SECRET=your-client-secret         # OAuth2 client secret from provider
# OIDC_REDIRECT_URL=https://listaway.your-domain.com/auth/oidc/callback # OAuth2 redirect URL
# OIDC_SCOPES="openid profile email"            # OAuth2 scopes, default "openid profile email"
docker compose up- https://localhost:8080/ (All paths will 303 to https://localhost:8080/admin/register)
Listaway includes a password reset feature that allows users to reset their password via email. When a user requests a password reset:
- The system generates a secure token and stores it in the database.
- An email with a password reset link is sent to the user's registered email.
- The link is valid for 1 hour and can only be used once.
To enable email delivery for password resets, configure the SMTP settings in your .env file as shown above. If SMTP is not configured, the application will log the reset emails to the console instead of sending them.
To enable OIDC authentication, configure the OIDC settings in your .env file:
OIDC_ENABLED=true
OIDC_PROVIDER_URL=https://accounts.google.com
OIDC_CLIENT_ID=your-client-id
OIDC_CLIENT_SECRET=your-client-secret
OIDC_REDIRECT_URL=https://your-domain.com/auth/oidc/callback
OIDC_SCOPES="openid profile email"- Google:
https://accounts.google.com - GitHub:
https://github.com(requires GitHub OAuth App) - Microsoft:
https://login.microsoftonline.com/{tenant-id}/v2.0 - Auth0:
https://your-domain.auth0.com - Any OIDC-compliant provider
For detailed setup instructions and provider-specific configuration, see OIDC_SETUP.md.
This repository is provided with a configured devcontainer that is available to assist in quickly bootstrapping a local development environment suitable to build and run this application locally.
- Install Docker, VS Code, and the Dev Containers extension in VS Code
- Make sure your Docker engine is running
- Click the
><in the bottom-left corner ->Reopen in Container
It is possible to do local development without using the devcontainer. Generally this involves following the steps encoded in the files under the .devcontainer folder.
Once you've installed the necessary tooling for this project (notably Go, Postgres, NodeJs, and Yarn), these steps will get the application server running:
yarn --cwd web run build- For the devcontainer users, the devcontainer will run this automatically for you each time you open it (you may need to manually "Refresh Explorer" to see the generated files for the first time)
go run cmd/listaway/main.go- Or leverage the
launch.jsonfile in VS Code
- Or leverage the
- The URL of the server is printed to stdout

