
Automated zero-shot video segmentation powered by SAM2 & Grounding DINO
🌟 Overview •
🎨 Visual Effects Showcase •
✨ Key Features •
📸 UI Screenshots •
🔄 Pipeline & Architecture •
🛠 Tech Stack & Repository Structure •
💾 Memory Management •
🚀 Getting Started •
🐛 Troubleshooting •
📜 Credits •
👨💻 Author
If you find RotoAI useful, please consider supporting the development!

RotoAI is an advanced open-source studio for prompt-driven video segmentation. It leverages a Hybrid Cloud-Local Architecture: a responsive React frontend runs locally, while the heavy inference is offloaded to Google Colab GPUs (T4) via a secure Ngrok tunnel. Powered by state-of-the-art foundation models (SAM2 & Grounding DINO), RotoAI introduces intelligent VRAM management and chunked processing, enabling high-resolution rotoscoping on free cloud tier hardware without memory bottlenecks.
- Semantic Understanding: Select objects using natural language prompts (e.g., "person in red shirt") via Grounding DINO.
- Hybrid Architecture: Combines the responsiveness of a local UI with the raw power of Cloud GPUs (Google Colab).
- Production Resilience: Handles long videos via Smart Chunking (5s segments) and Auto-Resolution Scaling to prevent OOM errors.
- Dual Detection Modes: Supports both generic Zero-Shot detection and Custom YOLO Models for specialized tasks.
- 6 Professional Effects: From cinematic B&W pop to neon glow overlays
Watch RotoAI in Action
Click to watch the full demonstration on YouTube
Discover the cinematic effects you can create in seconds.
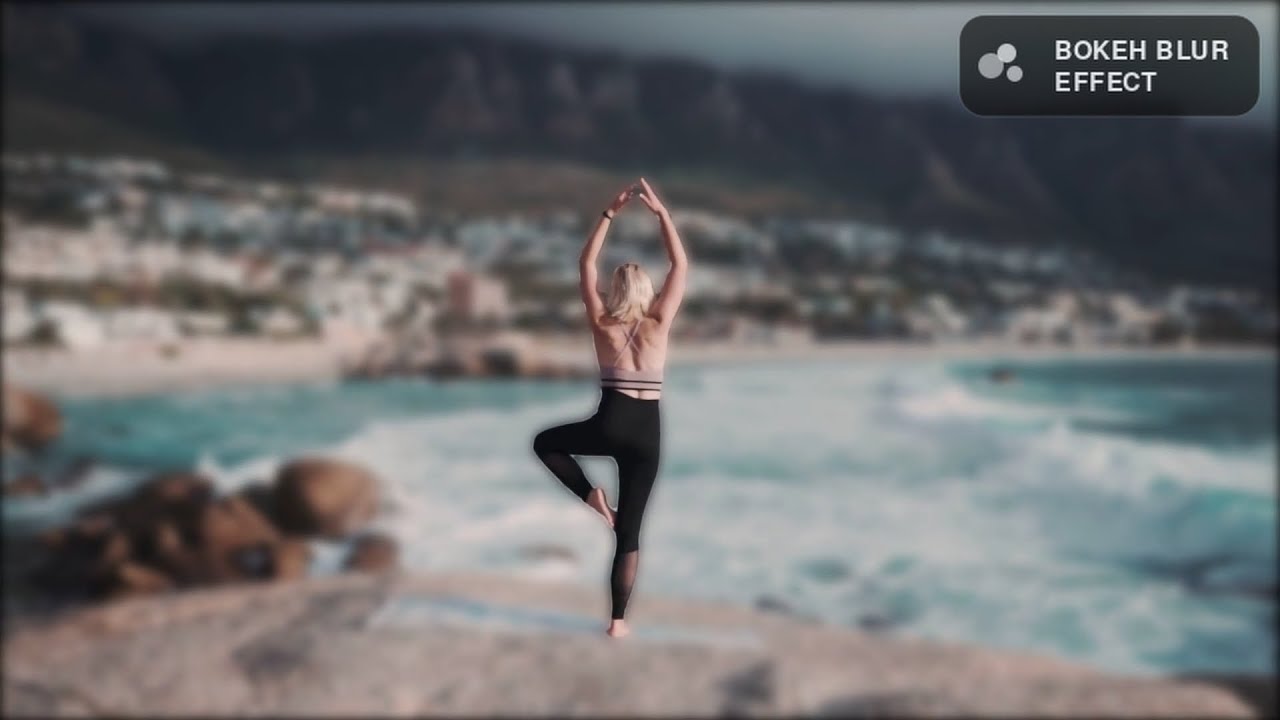
Simulates a high-end camera lens by applying a realistic Gaussian blur to the background, creating a shallow depth-of-field effect.

Prompt used: "Running man"
Replaces the background with a solid green (or custom hex) color, perfect for compositing in post-production tools like After Effects or Premiere.

Prompt used: "Boys dressed in red"
Isolates the subject by keeping them in full color while instantly desaturating the background to grayscale.

Prompt used: "Boy with orange backpack"
Adds a futuristic glowing outline around the detected subject. You can choose between a sharp border or a diffuse glow.

Prompt used: "Dancing man"
Configuration Options:
- ✅ With Border: Colored neon outline with edge detection
- ❌ No Border: Soft glow with adjustable blur radius (1-15)
Applies a cinematic desaturation filter to the background, creating a moody, vintage aesthetic while keeping the subject vivid.

Prompt used: "Man with glasses"
Highlights the contours of the subject with a radiant light effect, creating a sketched light-painting look.

Prompt used: "Doctors"
- Open-Vocabulary Detection: Zero-shot capabilities via Grounding DINO allows finding any object using natural language prompts.
- BYO Model (Bring Your Own): Support for custom trained YOLO (.pt) weights for specialized industrial or specific object detection.
- Interactive Calibration: Built-in Test Mode to validate detection accuracy on individual frames before committing to full GPU rendering.
|
Cinematic Effects
|
Advanced Filters
|
Effect.Previews.mp4
- Dual Output Modes: Side-by-side comparison or processed-only
- Smart Scanning: Configurable detection window (1-10 seconds)
- Precision Tuning: Adjustable confidence thresholds (0.01-0.80)
- Memory Management: Automatic resolution scaling for optimal VRAM usage
- Chunked Processing: Handles videos of any length without OOM errors
- GPU Acceleration: FP16 precision for 2x speed on modern GPUs
- Real-Time Progress: Frame-by-frame statistics with ETA
- Smart Caching: Efficient frame storage and cleanup
A glance at the RotoAI interface and its capabilities.

The entry point connecting the local React UI with the Colab GPU backend via Ngrok.

Test Detection Module: Validate prompts and confidence thresholds frame-by-frame before processing.


Select from cinematic effects like Neon Glow, Chroma Key, Bokeh Blur, and B&W Pop.

Fine-tune scan duration, confidence thresholds, and output formats (Comparison vs. Processed Only).

Built-in video player with loop functionality and instant download for the final rendered MP4.


End-to-End Flow: Visual step-by-step of the rendering process

Hybrid Infrastructure: Local Frontend connected to Remote Backend via Ngrok
Grounding DINO (SwinB) The prompt-master. Allows you to select objects using natural language queries (e.g., "black cat").
- Size: ~600MB
- Type: Zero-shot Object Detection
YOLO v8/v11 The specialist. Supports user-uploaded
.ptweights for fine-tuned tasks.
- Size: <100MB (Typical)
- Type: Custom Object Detection
SAM 2 (Segment Anything 2) The tracker. Handles the heavy lifting of propagating masks across video frames.
- Architecture: Hiera Small
- Size: ~180MB
- Performance: Real-time propagation
# Core Dependencies
PyTorch 2.0+          # Deep learning framework
FastAPI 0.104+        # Async web framework
Uvicorn               # ASGI server
OpenCV (cv2)          # Video processing
NumPy                 # Matrix operations
Pillow (PIL)          # Image manipulation
FFmpeg # Video encodingInfrastructure:
- 🌐 Google Colab: Cloud GPU environment (T4/P100/V100)
- 🔗 Ngrok: Secure tunnel for public API access
- 🔧 Nest AsyncIO: Event loop management for Colab
// Core Technologies
React 18              // UI library
Next.js 14            // React framework
Vite 5                // Build tool
Tailwind CSS 3        // Utility-first styling
Lucide React // Icon setThis directory contains the source code for the UI and the Backend logic.
Note: Large model weights are excluded from the repository to keep it lightweight. They are handled separately via Google Drive.
RotoAI/
│
├── be/                                # Backend (Python & Colab)
│   ├── app.py                         # FastAPI Entry Point (Inference Server)
│   └── setup_colab.ipynb              # Setup Script for Google Colab
│
├── fe/                                # Frontend (Next.js + TypeScript)
│   ├── app/                           # Next.js App Router
│   │   ├── globals.css                # Global Styles
│   │   ├── layout.tsx                 # Root Layout
│   │   └── page.tsx                   # Main Application Page
│   │
│   ├── public/                        # Static Assets (Logos, Icons)
│   ├── next.config.ts                 # Next.js Configuration
│   ├── postcss.config.mjs             # PostCSS Config
│   ├── package.json                   # Frontend Dependencies
│   └── tsconfig.json                  # TypeScript Configuration
│
├── public/                            # Demo media and visual documentation
├── .gitignore                         # Git Ignore Rules
└── README.md                          # Project Documentation
Since Google Colab environments are ephemeral (data is lost when you disconnect), RotoAI automatically creates a dedicated folder in your Google Drive during the first setup.
MyDrive/
└── RotoAI_Models/                       # Created automatically by setup_colab.ipynb
    │
    ├── sam2_hiera_small.pt              # SAM 2 Weights (~180MB)
    │                                    # Downloaded once, reused forever.
    │
    ├── groundingdino_swinb_cogcoor.pth  # Grounding DINO Weights (~600MB)
    │                                    # Prevents large downloads on every boot.
    │
    └── GroundingDINO_SwinB_cfg.py       # Model Configuration
                                         # Auto-copied from the repo for compatibility.
RotoAI intelligently manages VRAM to prevent crashes:
# Backend logic (simplified)
def calculate_scale_factor(video_width, video_height, total_frames):
    """
    Estimates VRAM needed and scales resolution if necessary.
    """
    # Memory needed (bytes)
    needed = width * height * 3 * total_frames * 4  # float32
    needed_gb = needed / (1024**3) + 3.0  # +3GB for models

    # Memory available
    total_vram = torch.cuda.get_device_properties(0).total_memory / (1024**3)
    used_vram = torch.cuda.memory_allocated() / (1024**3)
    available = total_vram - used_vram

    # Scale factor
    if needed_gb > available:
        scale = max(0.5, min(0.9, available / needed_gb * 0.85))
    else:
        scale = 1.0  # No scaling needed

    return scale
Example Scenarios:
| Video Resolution | Total Frames | VRAM | Scale Factor | Processed Resolution |
|---|---|---|---|---|
| 1920x1080 (FHD) | 900 (30s) | 16GB | 1.0 | 1920x1080 |
| 3840x2160 (4K) | 1800 (60s) | 16GB | 0.5 | 1920x1080 |
| 1920x1080 (FHD) | 5400 (3min) | 8GB | 0.7 | 1344x756 |
Key Insights:
⚠️ Never scales below 50% (maintains quality)⚠️ Never scales above 90% (safety margin)- ✅ Dimensions aligned to 16 (codec requirement)
Videos are split into 5-second chunks:
chunk_duration = 5  # seconds
chunk_frames = int(fps * chunk_duration)  # e.g., 30fps * 5s = 150 frames

for chunk_idx in range(num_chunks):
    # 1. Extract frames for this chunk
    frames = extract_chunk(video, start_frame, end_frame)

    # 2. Initialize SAM2 for chunk
    sam2.init_state(frames)

    # 3. Propagate masks frame-by-frame
    for frame_idx, mask in sam2.propagate():
        rendered_frame = apply_effect(frame, mask, effect_type)
        save(rendered_frame)

    # 4. Cleanup (free VRAM)
    sam2.reset_state()
    del frames
Why 5 Seconds?:
- ✅ Balances memory usage vs. tracking continuity
- ✅ ~150 frames at 30fps (manageable for SAM2)
- ✅ Smooth transitions between chunks
Follow these steps to set up the Hybrid Architecture:
- ☁️ Cloud: Start the heavy AI backend on Google Colab.
- 💻 Local: Start the user interface on your machine.
- 🔗 Connect: Link them together via Ngrok.
- Google Account: To access Google Colab.
- Ngrok Account: Sign up for free and get your Auth Token.
- Local Machine: Node.js (v18+) and Git installed.
The backend handles the heavy AI processing. We run this on Google's servers to save your local resources.
- Go to Google Colab.
- Upload the file
be/setup_colab.ipynbfrom this repository (or create a new notebook). - Crucial: Go to menu Runtime → Change runtime type → select T4 GPU.
- Click the Key Icon (Secrets) 🔑 in the left sidebar of Colab.
- Add a new secret:
- Name:
NGROK_TOKEN - Value:
Your_Ngrok_Auth_Token(from your dashboard).
- Toggle the "Notebook access" switch to ON.
Run the cells in the notebook in order. They will:
- Verify GPU (Must be T4).
- Mount Google Drive (To create the
RotoAI_Modelscache folder). - Install Dependencies (SAM2, GroundingDINO, etc.).
- Start the Server.
At the end, you will see a log like this:
🚀 SERVER v7.2 ONLINE!
🔗 https://a1b2-34-56-78-90.ngrok-free.app
📋 Copy this URL. You will need it for the frontend.
The frontend is the visual interface running on your computer.
Open your terminal and run:
# 1. Clone the repository
git clone https://github.com/sPappalard/RotoAI.git

# 2. Navigate to the frontend folder
cd RotoAI/fe

# 3. Install dependencies
npm install
Start the development server:
npm run dev
Your terminal will show:
  ▲ Next.js 14.2.3
  - Local: http://localhost:3000
Open http://localhost:3000 in your browser.
- On the web page (
localhost:3000), you will see a "Backend Connection" input field. - Paste the Ngrok URL you copied from Colab (Step 1).
- Click Connect.
✅ You are ready! The status indicator should turn Green.
- Upload: Drag & drop a short video (recommended: 10-15s for testing).
- Prompt: Type what you want to rotoscope (e.g., "black dog", "person dancing").
- Effect: Choose a visual effect (e.g., Neon, Green Screen).
- Generate: Click "Generate Roto Effect" and watch the progress bar!
🔴 "NGROK_TOKEN not found" error
Problem: Ngrok authentication token not configured in Colab Secrets.
Solution:
- Go to https://dashboard.ngrok.com/get-started/your-authtoken
- Copy your token
- In Colab: Click 🔑 icon (left sidebar) → "Add a new secret"
- Name:
NGROK_TOKEN - Value: Paste your token
- Toggle switch to enable
- Restart Colab runtime
🔴 "CUDA out of memory" error
Problem: Video too large for available VRAM.
Solutions:
- Use shorter test clip (10-15 seconds)
- Restart Colab runtime to free memory
- Try lower resolution source (720p instead of 1080p)
- The app should auto-scale, but manual scaling may help:
# In app.py, force scaling
scale = 0.7  # 70% resolution
Note: T4 GPU (Colab free tier) has 16GB VRAM. For 4K videos >1 minute, consider Colab Pro (V100, 40GB).
⚠️ "No object found in scan period"
Problem: Detection failed to find objects in initial frames.
Solutions:
- Increase scan duration: Advanced Settings → Scan Duration → 8-10s
- Lower confidence threshold: 0.35 → 0.25
- Try different prompt:
- Bad:
"person walking"(too specific) - Good:
"person"(simple, general)
- Bad:
- Test Detection first: Verify object is visible in scanned frames
🔴 Server disconnected during processing
Problem: Colab runtime timed out or Ngrok tunnel closed.
Causes:
- Colab inactivity (90 minutes free tier)
- Ngrok free tier session limit (2 hours)
- Browser tab closed
Solutions:
- Keep Colab tab active (interact every 60 minutes)
- Use Colab Pro for longer sessions
- Upgrade Ngrok for permanent tunnels
- Split long videos into shorter segments
🔴 "Failed to upload video. Please check URL."
Problem: Frontend can't reach backend API.
Checklist:
- ✅ Is backend cell running in Colab?
- ✅ Is Ngrok URL copied correctly? (no trailing slash)
- ✅ Does URL start with
https://? - ✅ Try visiting URL in new tab—should show FastAPI docs
- ✅ Check browser console for CORS errors
Test Connectivity:
# In terminal
curl https://your-ngrok-url.ngrok-free.app/status
# Should return: {"status":"idle","progress":0,...}
⚠️ Video player shows black screen
Problem: Processed video failed to load or is corrupted.
Solutions:
- Check format: Only MP4/H.264 supported in browser
- Re-download: Right-click video → "Save video as..."
- Try VLC: Open downloaded file in VLC Player to verify
- Re-process with different settings
🔴 "Test Detection" stuck loading frame
Problem: Backend not responding to /extract-frame endpoint.
Solutions:
- Check Colab: Is runtime still active?
- Refresh page: Sometimes state gets stale
- Re-upload video: Upload process may have failed silently
- Check total_frames: Should be >0 after upload
Debug:
// In browser console
console.log(totalFrames); // Should be >0-
SAM2 by Meta AI Research
- State-of-the-art video segmentation model
- Paper: "Segment Anything in Images and Videos" (Kirillov et al., 2024)
-
Grounding DINO by IDEA-Research
- Zero-shot object detection with text prompts
- Paper: "Grounding DINO: Marrying DINO with Grounded Pre-Training" (Liu et al., 2023)
-
YOLO by Ultralytics
- Fast and accurate object detection framework
- Used for custom model support
- FastAPI - Modern Python web framework
- React - JavaScript UI library
- Tailwind CSS - Utility-first CSS framework
- PyTorch - Deep learning framework
- OpenCV - Computer vision library
- FFmpeg - Multimedia processing
- Google Colab - Free GPU compute for AI researchers
- Ngrok - Secure tunneling for local development
- Roboflow - Computer vision development platform
RotoAI is created and maintained by sPappalard.
If you find this project useful, please give it a ⭐ star or support the development!
This project is released under the GNU Affero General Public License v3.0 (AGPL-3.0).
Why AGPL-3.0? This project integrates Ultralytics YOLO, which is licensed under AGPL-3.0. As a derivative work, RotoAI inherits this license to ensure full compliance with the open-source terms of its dependencies.
What this means for you:
- ✅ Use: You can use this software for personal, research, or commercial purposes.
- ✅ Modify: You can modify the source code.
- 🔄 Share: If you distribute this software or host it as a network service (SaaS), you must disclose the source code of your modified version under the same AGPL-3.0 license.
Copyright (c) 2025 sPappalard.
Note: This project also utilizes SAM 2 (Apache 2.0) and Grounding DINO (Apache 2.0).