-
Notifications
You must be signed in to change notification settings - Fork 83
CoreDocAtari800
This page has operating instructions for the Atari 800 core.
- Core binaries (use latest date)
- Official core manual
- Source code
- Author's home page
- Thread at AtariAge
For a more complete guide please refer to the official manual linked above.
After following the binary link above, go into the latest folder and find atari800.rbf located under /mist/build_NTSC_VGA/out/ .
Copy the file to the root of an SD card, and if you will only use the SD card for this core, then also rename the file to core.rbf.
Create the following sub-folders in the SD card:
/atari800//atari800/rom//atari800/user/
Copy an image of the Atari800 ROMs into the /atari800/rom/ folder.
You will need three files: ATARIBAS.ROM, ATARIOSB.ROM, and ATARIXL.ROM.
Copy games into the /atari800/user/ folder. Supported file formats are CAR, ATR, XFD, XEX.
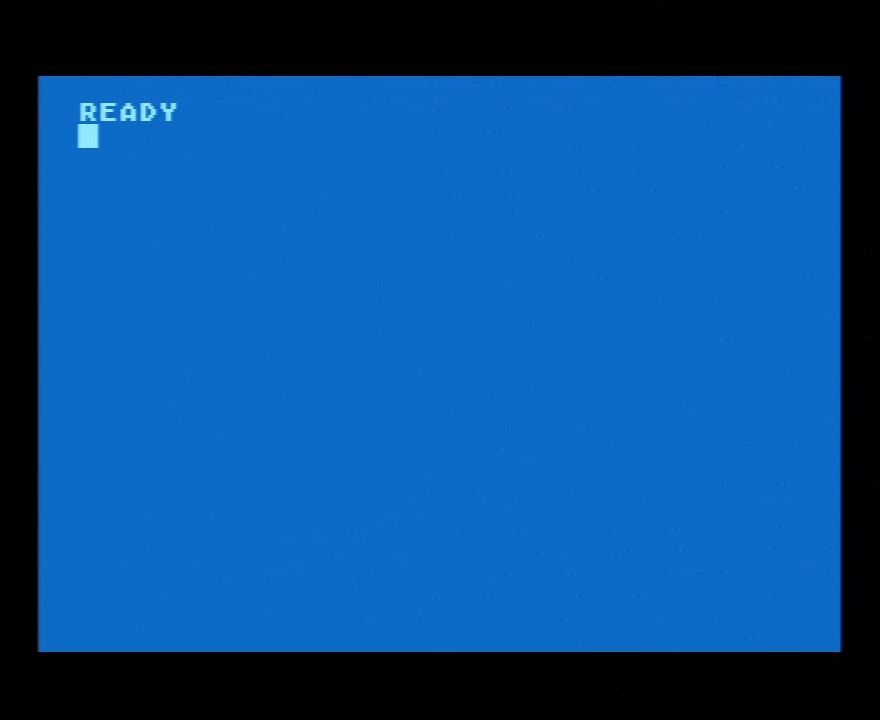
If everything is setup correctly you should see this screen at startup:

For a full keyboard mapping reference, please refer to the official core manual.
- F5: Help
- F6: Start
- F7: Select
- F8: Option (see note below)
- F9: Reset
- F10: Cold start
- F11: Load new disk or cartridge
- F12: Enter System menu
- Pause: Break
- Delete: Freezer (if installed, see official manual)
- Left Alt: Toggle scanlines
- Right Alt: Atari key
You can use any gamepad / joystick for games, although some games will require the use of an analog controller. These are only supported via USB, and you can use an adapter to connect a real 2600/5200 analog controller.
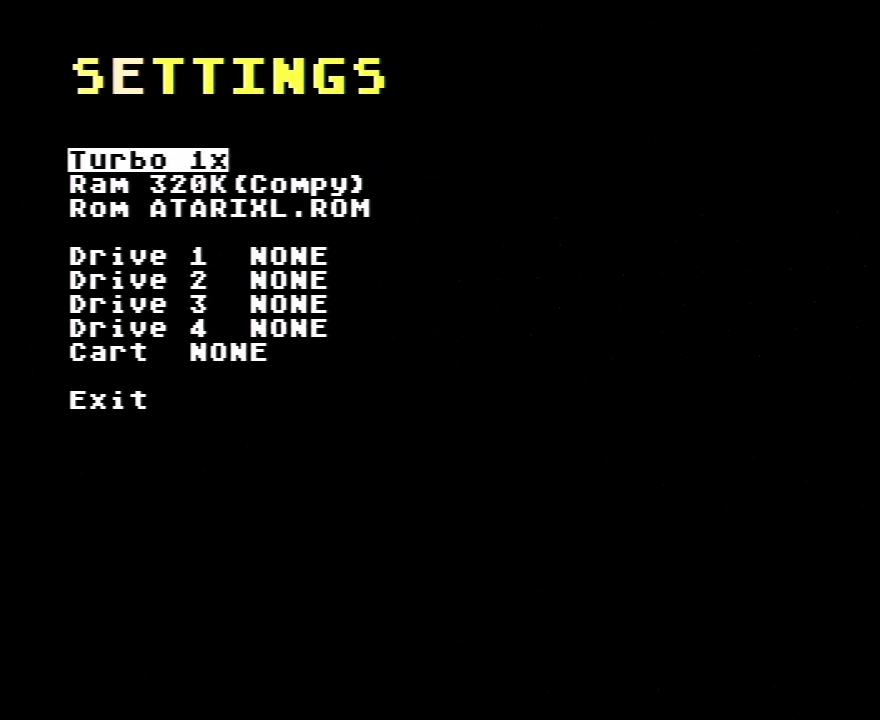
Press F12 to enter the OSD Menu.

In this menu you need to move around with the keyboard arrow keys, and select with Enter.
- Turbo: accelerate the core (default is 1X)
- Ram: Avaiable RAM, can choose different extension options
- Rom: Name of the ROM being used.
-
Drive 1-4: Load disk from
/atari800/user/ -
Cart: Choose a cart to load from
/atari800/user/
Turbo should be left at 1X for maximum compatibility (a higher value could cause image glitches in some games).
It is possible to change the Rom path through this menu, but not necessary.
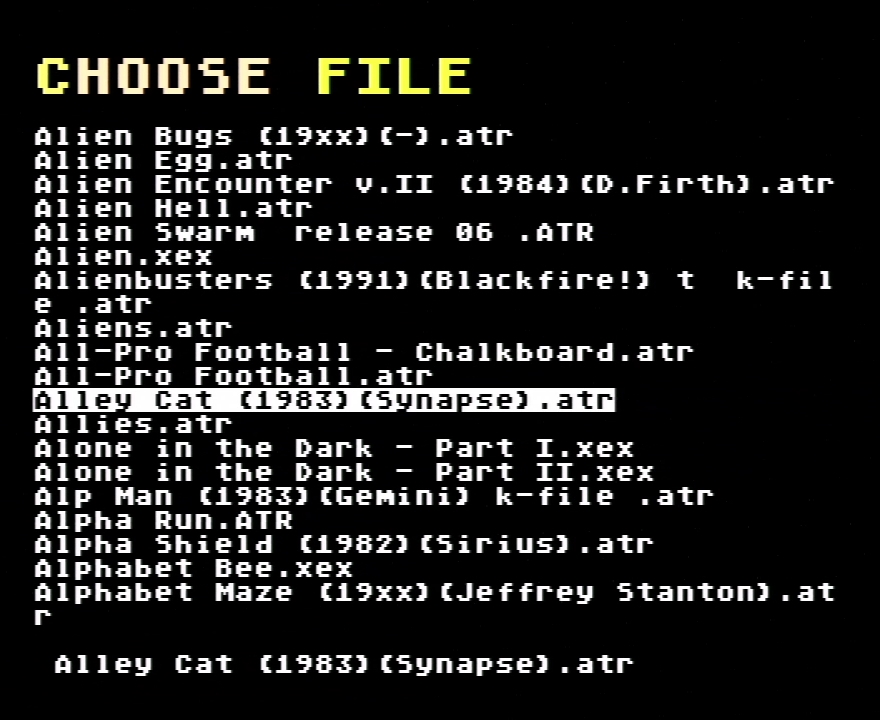
You can press F11 instead of F12 to directly go into the Load Disk option.

Note: When selecting a game, keep F8 press to load disabling the BASIC bios, this improves compatibility with games (this "quirk" is from the real machine, and happens when you try to run machine language games from BASIC).
Some games require using Start, which is F6.
MiST FPGA - One Chip to Rule Them All
- What is it?
- FAQ
- Board overview
- Installing firmware
- Joystick mapping
- Peripherals
- Projects it is based on
- Rom Management
- Setting up a mist.ini file
- Using a custom font
- Tested Displays/Upscalers
- Troubleshooting
- Videos
- User Videos
- Getting Started
- Current core status
- Joy/Keyboard/On-board Shortcuts
- MIDI support
- SD card setup
- Startup menu
- Acorn Archimedes
- Amstrad CPC
- Amstrad CPC - alternative
- Apogee BK-01/Radio86RK
- Apple I
- Apple II+
- Apple //e
- Apple Macintosh
- Atari 800
- Atari ST
- Atari ST/STe (mistery)
- BBC Micro
- BK0011M
- Commodore 16/Plus4
- Commodore 64
- Commodore Amiga (AGA)
- Commodore PET
- Commodore VIC-20
- Elan Enterprise
- Exidy Sorcerer
- HT1080Z (TRS80 I clone)
- LM80C
- Luxor ABC 80
- Mattel Aquarius
- Miles Gordon SAM Coupe
- MSX
- Ondra SPO 186
- Oric
- PC (Next186)
- PC (XT)
- Primo
- Sinclair QL
- Sinclair ZX80/ZX81
- Sinclair ZX Spectrum
- Sinclair ZX Spectrum 48K - alternative
- Sinclair ZX Spectrum Next
- Specialist/MX
- Tandy TRS-80 Model I
- Tandy TRS-80 Color Computer
- Texas Instruments TI-99/4A
- TSConf
- Vector-06C
- Videoton TVC
- Vtech Video Technology Laser 350/500/700
- Atari 2600
- Atari 5200
- Atari 7800
- Bally Astrocade
- Coleco ColecoVision
- GCE Vectrex
- Intellivision
- Nec PC Engine/TurboGrafx-16
- Nintendo Gameboy
- Nintendo NES
- Nintendo SNES
- Philips Videopac/Odyssey²
- Philips Videopac/Odyssey² - alternative
- Sega Genesis/Megadrive
- Sega Master System
- SNK Neo Geo MVS/AES

